


SCHUMACHER CAT PB REVIEW
There are two reasons I was unable to resist the temptation to build and run the Schumacher R/C Racing CAT PB 4wd buggy this (down under) summer.
The first is spending a week trackside at the World Championships, watching the best 10th racers on the planet go at it. I’ve spent most of my rare wheel time in the last few years steering an 8th eBuggy, but after the Worlds, the lure of their smaller cousins was strong. 10th offroad, after all, is where I started and spent so many years. And 4wd Mod 1/10th is still my all-time favourite class. Amazing to drive. Challenging to be fast. Super fun.
The second is the implications of this particular buggy in the long history of the British manufacturer. It’s well documented that the CAT PB is the first time they’ve built a shaft-driven race car, and that marks a significant moment. I’ve had a long on-and-off connection with the brand, so this factor alone was enough to pique my curiosity. I have to know what this car will be like to build, to drive and to maintain.
Those were enough motivation for me, and with big thanks to Schumacher, Hobbywing, and Mach-1, here we are.
If you’ve been here before, you’ll know that you’re not about to read a highly technical review, where we analyse the minutiae of geometry and materials engineering. Instead, we’ll focus on the experience and our reactions to it – in the build, the tuning, the driving, and stretching to explore the electronics package we’ve assembled for this car.
You’ll also know you’re starting what is inevitably going to be a long read. You know we rarely write short stories! If you prefer a video review, stick with us, that will be out in the next week or so.
HISTORY AND CONTEXT
What’s to say here that we don’t already know? Since Masami Hirosaka wheeled the long-wheelbase version of the original CAT to a World Championship in 1987, Schumacher has been ever-present in the 4wd class. Apart from the CAT nameplate, one thing has been common across every one of their competition 4wd cars – a belt-driven transmission. They stuck with it, extracting more and more performance over the years, even as their main rivals progressively shifted to the now-ubiquitous shaft-drive layout. Now, finally, having pushed the belts as far as technology allowed, and with the demands of modern, high-grip racing surfaces asking for a different feel from the car, Schumacher have finally made the (drivetrain) move. The CAT PB (the PB designation honouring long-time engineer Phil Booth) provides the company with a whole new platform, and re-sets the development pathway for chief designer Tris Neale.
In terms of the car itself, there are two versions of the kit: the CAT PB Mod Spec, and CAT PB Dirt Spec – both based around the same alloy chassis, shaft-driven layout. Naturally we’ve built the Dirt version to run in our local conditions (more on this later). The main differences between the two are in the drive-train – the Dirt version packing three fluid-filled differentials, while the Mod version (oriented to carpet and astro-turf surfaces) includes a slipper with front-adjustable brake and U/J driveshafts front rear (where the Dirt car has CVD’s up the back).
There are other, minor, differences between the pair in terms of fluids, recommended starting points for setup and so on.
Elsewhere, it’s new suspension geometry when compared to the previous L1R platform, plus all the modern requirements – easy access diffs, pill adjustable suspension geometry, to name a couple of focus points in the design work.
We took the opportunity to add just a couple of option parts from the long list of available choices. The one-piece alloy servo mount, and the alloy front castor blocks both made the list, along with a tuning package of anti-roll bars and the latest “Agile” spring range from Schumacher house brand, Aerox. More on those later too.
THE BUILD
I have a life-long aversion to three elements of every RC build – diffs, shocks and turnbuckles. Guess what the PB build starts with. After getting my grumbling out of the way, we got on with it, following the typically excellent instruction manual and building the kit to the recommended Dirt edition settings – starting with those three much unloved jobs (speaking purely personally of course!).
The overwhelming sense I have from this build is the quality of materials, of engineering approach, and of fit-and-finish. It’s been a minute since I last built a Schumacher car (aside from the re-released Cougar 2 Works), and there have clearly been huge strides in these areas. It’s a delight to build, and I found myself enjoying the process (even those first three jobs went fine!).
What did I particularly notice? The steering assembly is beautiful, and I’m intrigued by the approach Schumacher has taken in angling the steering posts back to match the front chassis kickup, rather than the more typical approach of setting them vertically. I also appreciate the full pill-adjustable suspension geometry in the all-alloy A/B/C/D arm mounts, and the ability to play with flex using different combinations of screws and (optional) stiffeners in the central spine of the chassis.
In their normal fashion, Schumacher provide all the fluids, greases and threadlocks that are called for in the build. I used those materials everywhere and have found myself quite happy with what was provided.
There are a couple of places where I stumbled – essentially because having built more than a few cars over the years, I felt quite justified in taking only a cursory glance at the manual, and then getting on with the next step. That meant I missed the fine detail a couple of times – different width inner and outer wheel bearings, or different length front castor block screws, for example – and had to back-track to fix operator-induced errors. The manual is easy to follow, and quite clear on what’s required – I just chose to ignore it and paid the price.
One tip I picked up elsewhere but proved helpful was in mounting the carbon radio tray. The manual calls for a threaded insert to be glued into the tray, which I did, but found it helpful to also add a dot of superglue and attach the small plastic spacer that holds the tray off the alloy chassis. On first assembly I left that spacer separate and juggled it all together, but later went back and glued it to the underside of the tray – making life much easier for the future.
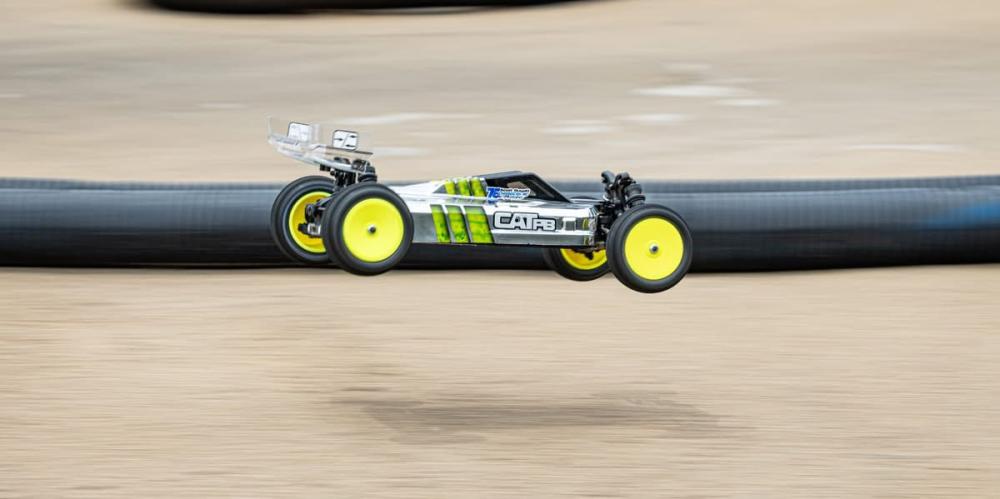
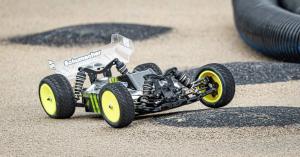
Finishing the package is the JConcepts S2 body – included in the kit – and my good friend Tony Gray (of Paint & Graphics by TFG) has taken on the CAT motif and produced what I think is a stunning bodyshell. I’ll include some close-ups in the photos so you can see some of the fine cat-inspired details TFG has included. Thanks Tony!
We cut the supplied wing down to the second cut-line, and that proved a good starting point.
The Dirt Spec kit ships with yellow wheels (fresh from a Worlds Win for Broc Champlin), or the Mod spec with white wheels. TFG's paint works well with yellow, so we will stick with that colour for a while.
COMPLETING THE PACKAGE
To complete our build, we’ve opted to go with Hobbywing Technology and Mach-1 RC Products electronics.
Power comes from the new Hobbywing XeRun XR10 Pro Legacy ESC (to give it its full name) and G3 7.5T modified motor. The Legacy is new to the Hobbywing lineup, slotting in just below their flagship XeRun XR10 Pro G3 but at a more affordable price point.
I’m under no illusions about my ability to compete at the sharp end of national-standard fields these days, so the Legacy is an ideal option for my needs. It packs some features ideal for the club racer – reverse polarity protection, and smart fan management, for example – while still offering a host of performance-tuning features to adjust power and brake feel and performance. We’ve already started playing with some of these tuning items, more in our track test section.
For its part, the G3 motor is well-established, bulletproof and performance-proven. On my local track, the quick guys are running 5.5t motors, but the 7.5 provides the ideal balance of performance and driveability that I need at this point in my driving life.
The side-mounted wires on the Legacy work ideally with the CAT PB, and I’ve followed the lead of most of Schumacher’s pro drivers in mounting the ESC up front on the carbon fibre radio tray, and fitting my receiver and transponder on the right behind the servo.
Speaking of servos, for me the choice is the Mach-1 RC Products M62SR steering servo (the 10th servo that joins the full-size M81SR in their servo lineup) to handle steering duties. I really like this servo. It completes the build along with Mach-1’s Titanium series HV-Lipo 6300mah pack. I’ve been using the Mach-1 servos and batteries for a while now and have been very happy with both feel, and performance. And, I have to say, I love the idea of being able to run products from an Australian company, with Mach-1 based here in south-east Queensland where I live.
Tyre-wise, the Jetko J-One is the tyre of choice at our test track, so that’s what we’ve mounted up – courtesy of Speedy RC. We’ve gone with the Medium-Soft compound and with standard (supplied) closed-cell foam inserts. So far, those tyres have been a perfect match for the track surface, with excellent performance and decent life-span.
THE DRIVE
My local 10th club is the storied Chargers RC. With over 40 years of history across multiple venues, Chargers now mainly runs on a super high-grip outdoor dirt track (alongside their smaller vintage-friendly dirt circuit). Coated with a product known here in Aus as “Sic Surface”, it offers up very high bite for a dirt track. The surface rarely breaks down, and the track and jump faces are pretty consistent.
With this surface being somewhat unusual, I wasn’t sure what to expect, or even where to start in terms of setting up the CAT PB. When in doubt, build it to kit settings, right? So that’s what we did, following the manual for the Dirt edition build, including shock and diff fluids, geometry choices, anti-roll bars and so on. I figured I’d go from there, heading for my first track day with a fully charged electric screwdriver, full expecting to spend all day changing diffs and shocks and anti-roll bars and dialling in geometry to get the car in the window.
Surprise, surprise, none of that was necessary. It shouldn’t have surprised me, I suppose. Most dirt tracks today are quite high-grip in one form or another, so with out of the box settings designed for such grip conditions, the car was well in the window. The kit diff fluids (12k/300k/12k front-to-rear), shock package and even anti-roll bars were close to the money, and I could concentrate on just re-learning the world of 10th off-road. I found a car that was delightfully neutral, easy to drive and with no bad habits. It got into the apex well, rotated well and got the power down effortlessly. It also behaved really well in the air, never getting me in trouble. For me, at this point in my driving life, those are exactly the characteristics I’m looking for.
Clearly, if you want to win races, you’ll want more, and in the hands of drivers of the calibre of Broc Champlin, Michal Orlowski and Daniel Kobbevik, the CAT PB has already proven this capability. I have the feeling we’ll see a growing team here in Australia over the next few months exploring the performance envelope with this car and running up front in local conditions too.
At one point, I flung the radio at one highly-credentialled driver who immediately got down to perfect lines and competitive times – and remarked afterwards just how comfortable that kit setup had been.
Let me pause at this point to say a huge thanks to Steve Watts Racing Photography. Steve was trackside the day I was testing and pointed his camera at the CAT PB to capture the on-track images you can see in this review. Steve is amazing, make sure you keep an eye on all his work over at his Facebook page – and if you haven’t already, scroll back and check out his 2025 Worlds galleries – some banger shots there.
DIALING IN
After a while, that package of tuning options did get the better of me, and we played with some options to see what happened. The Aerox ‘Agile’ range of springs seemed a good fit for the track, and I liked the Orange front and Green rear combo, also trying the slightly firmer Blue rear. As track temperatures climbed in an Australian summer, we went up in shock fluids (from the kit 400 rear/500 front combo, to 500/600 – all from Core RC) too.
On the electronics side, the Legacy ESC proved an ideal companion. A couple of friends lent me both the Hobbywing OTA Programmer, and the Multifunction LCD Program Box Pro at different points to experiment with settings. To deal with my return to 10th, and a “slightly” heavy trigger finger, we played with Throttle Rate Control (setting it to 20), Initial Throttle Force (2), PWM Drive Frequency (12K and 16K at different points) and tuned Brakes with both Max Brake Force at 85% and playing with both Brake Rate Control and Brake Frequency. For Boost and Turbo options, it was a gentle start, but with hopes to play more in this realm next time I make it to the track. On these first runs, I appreciated the smoothness of power delivery, and also the way we made the Brake settings work – for both in-air control and getting deep into some of Chargers' tighter corners. There are so many options to explore here, and I’m excited to keep learning what the Legacy can do. I already have a list of settings to try next time I make it to the track, starting with those Boost and Turbo options.
I do have to confess, much to my embarrassment, to putting the Legacy’s claim of reverse polarity protection to the test – for the first time I can remember (must be my advancing years). The capacitor pack didn’t survive, but the ESC did – and that made my mistake a much cheaper one than would have otherwise been the case. Thank goodness. Lesson learned!
THE VERDICT?
The verdict here is no surprise. If we go back to where we began, there are many reasons why we might choose a car. For me, the choice here has been vindicated already. I got to build and drive Schumacher’s first-ever shaft-driven 4wd. That might not matter to you, but it was an important part of the experience for me.
More than that, though, right away I experienced accessible performance and a base handling characteristic that is suited to what I need from the CAT PB.
I thoroughly enjoyed driving the car, and it has me itching to get back to the track for more, just as soon as possible. This car, and my return to 10th tracks, has me keen to practice, to improve, and to go racing. That’s a pretty good outcome from any build.
These days I think the choice of a car for me is less about how it feels on the track, and much more about how it makes me feel when I’m driving it. On this occasion, I got both in one package. Win!
Huge thanks once again to those who helped make this build possible: Schumacher, Hobbywing, Mach-1, Paint by TFG, SpeedyRC Online Store and Steve Watts Racing Photography, and to Tris, Chris and Iain for advice and borrowed equipment.