


Marcus von Elling
I have raced in the following classes:
- 1:12 1983-1993
- 1:8 Track 1987-1993
- 1:10 Touring 1995-2000, 2014->
- 1:5 Largescale 1997-2006, 2011->
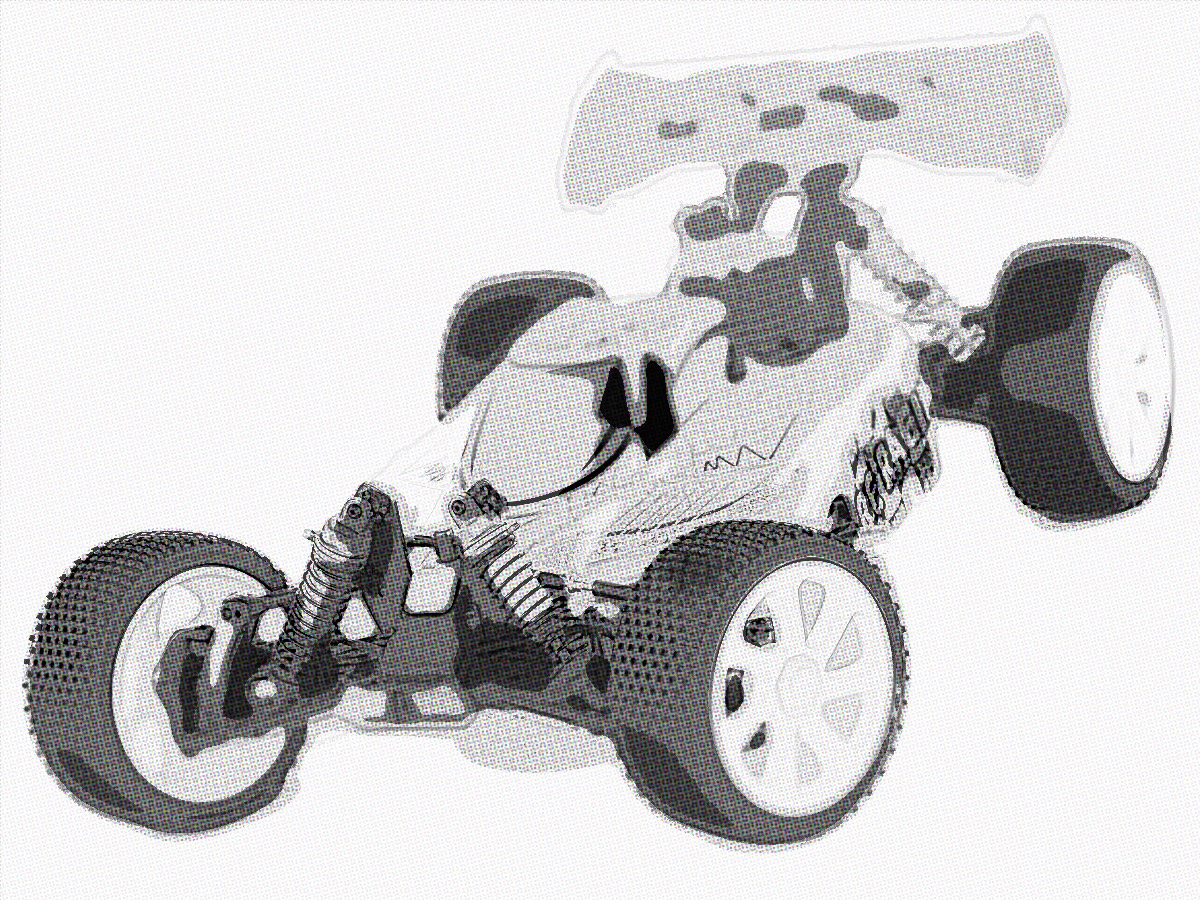
- 1:10 Electric Buggy 1982-1990ish
- 1:8 Electric Buggy 2015-2018
- Kyosho EuroCup Winner 1996 (Paris), 2nd 1997 (Lisboa). World final finalists
- Swedish nationals, 2nd place 1:10 Touring 1998
- Swedish Junior champion in 1:12 - 1988
- Swedish champion in 1:10 Touring (Stock) - 2018, 2019
- Swedish champion in 1:10 Touring (13.5 Open) - 2024
- Swedish Champion Largescale - 2001, 2004
- Nordic Champion in 1:10 Touring Modified - 2018
- Worlds finalist in RC-bikes, best place 6th.
- Founder of Luleå R/C Klubb 2016, former MFK Jupiter.
- ETS A-Finalist (6th) FWD on my first entry, FWD Wiener Neustadt 2024
- Swedish National Champion 1:10 Touring 2024
- President of Lidköpings RC Club
- Chairman of Svenska Bilsport förbundet , 1:1o Electric section.
- Schumacher RC Racing - Team driver from 2024
I´m also flying and building R/C-planes/helis since 2004!
Sponsors:
- Schumacher RC Cars
- Mnicars Hobby AB
- Zombie motors & batteries
I also have a long experience as a hobby detalist and the last years I´ve been responsible for starting up with R/C Cars in my local club Luleå R/C Club.
Please follow me on facebook: https://www.facebook.com/Racingvonelling
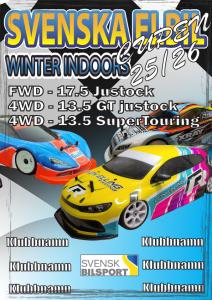
| #1 emoji_events | Race 2 Lidköping DeLa Gardie 2025-12-28 1:10 4WD - 13,5 GT Justock |
| #2 emoji_events | Race 2 Lidköping DeLa Gardie 2025-12-28 1:10 4WD - 13,5 Supertouring |
| #11 emoji_events | LRCK Klubbmästerskap 3 av 4 Utomhus Mega-event” 2025-09-14 1:10 4WD GT |
| #1 emoji_events | LRCK Klubbmästerskap 3 av 4 Utomhus Mega-event” 2025-09-14 1:10 4WD Supertouring |
| #1 emoji_events | SEC 25-6 Skövde FINAL 2025-08-17 1:10 4WD Supertouring |
| Upcoming Events | |||
|
Race 3 Sjöbo Tuna RaceHouse 2026-02-07 1:10 4WD - 13,5 Supertouring | ||
|
|
Race 3 Sjöbo Tuna RaceHouse 2026-02-07 1:10 4WD - 13,5 GT Justock | ||
| Last 3 Events | |||
|
Race 2 Lidköping DeLa Gardie2025-12-28 1:10 4WD - 13,5 Supertouring |
||
|
Race 2 Lidköping DeLa Gardie2025-12-28 1:10 4WD - 13,5 GT Justock |
||
 |
LRCK Klubbmästerskap 3 av 4 Utomhus Mega-event”2025-09-13 1:5 Largescale - Lördag |
||
|
MRC Wiener Neustadt - Club Race report
Facebook
2021-09-19
|
 |
Schumacher Mi9Car by Schumacher Setups |
 |
XRAY X4Car by XRAY Stock Setups |
 |
XRAY X4Car by XRAY Modified Setups |
 |
RS5 C 006 Carbon carCar by RS5 Setups |
 |
XRAY T4´20Car by XRAY Setups |
| Xray X4 RT Pegasus | picture_as_pdf | X4 | 2022-02-19 | |
| T4 ´21 Stock Indoor XRS #1 | picture_as_pdf | T4'21 | Hudy Arena | 2021-10-09 |
| T4 ´21 Stock 13.5 | picture_as_pdf | T4'21 | MRC Wiener Neustadt | 2021-08-14 |
| T4 ´21 Modified | picture_as_pdf | T4'21 | MRC Wiener Neustadt | 2021-08-14 |
Xray Challenge Slovakia - Run 1/6 2021-22
Hudy Arena - XRS Slovakia round 1This was the first opportunity for me to visit this, what should we call it? Myth-ridden venue for R/C car racing. We, my little boy and me arrived for free practice allready on friday. We arrived at 16-ish but the track was held open allready from 0800 in the morning.
The venueFirst thing we just unpacked the car, got a good pit space next to Alexander Hagberg and then took a walk around the facility. With an indoor 1:10 buggy track, an indoor on-road track, an indoor clay track and a huge outdoor on-road track this arena is like heaven for all of us into this sport. Add to this a restaurant and there is no arguing for not going there :) F1Léon made his debut with the F1 car. I had him attedning the race but due to his age he was a little bit too tired on friday night so we called it out. He was happy with driving a real racecar and made three outings with good progress every run.
TouringcarI attended both the modified and the 13.5 stock classes. Both cars where set-uped like I would for black ETS-carpet at home and my T4-21 felt good right from the start. In both classes we had to use the Hudy C3-28 tyres which I love. It took like 3-4 runs on this track to have them perform at their best but then you could easily use them 11-12 packs before they started to drop. Actually, Alexander made his best practice on friday using a set which had 12 packs on them! 13.5 StockIn stock we used handout motor, Hobbywing Justock 13.5 with no timing and a FDR of 5.0. I actually thought this would be too slow but they gave great fun and exiting racing. On this car, I basically only changed two things. At the rear I opted for the 2.7 spring instead of the 2.6 and I also added one screw in the front of the motor-mount. Both this made the car more agile and more free during the corner. My car was spot on and I was quite surrised that I managed to take the top qualifier spot in front of Team Xray Driver Oliver Havránek. I also managed to set the fastest lap of the event which really proved that my car with the Bittydesign Hyper-HR was on spot. My Zombie 6000mAh batteries provided me with incredible punch (low voltage drop) during the complete runs.
In the finals my lack of practice together with some sleepiness had me make a couple of small mistakes. On this level of racing you will instantly be punished and Oliver had the win in A1. In A2 there was some tumble and I was taken out and had to fight back up to second place. In A3 I had the lead from tone to flag. In stock the car was very good to drive. I used a little harder rear diff, 7k instead of my normal 4-5k oil. This was du to the fast chicane just down from the rostrum and to be able to keep up the speed without having the car to pointy. I really think I got out my max from the chassis but for the next outing I still have some cards to play with my electronics :) ModifiedIf my stockcar was on point I had to work harder with the modified chassis. The car felt good but I couldn´t get over the feeling of the throttle. It went from too aggressive to very much expo-feeling and all in between. Finally I found out, thanks to Alexander what parameters I should change and it was like a night and day feeling. When I finally could moderate the throttle I could start with the setup. The car was very much like the stock one except the forward screw in the mount and I also put in 8k in the diff due to the power this setup produces. This car has the Zombie 4400mAh low CG batteries fitted and when the last final was run I was quite happy with the setup I opted for.
The finals was a nightmare… I managed to quali for 6th position and didn´t check the listings as I should have done. I just imagined that they would run 8 cars in the main final and was out looking on the B-main when Martin walks up and excuses himself for not informing me that they went with 5+5 in each finals to make up for marshalling. So, I just missed out on the first final. In the second I just did my worst driving in a couple of years, hitting almost every barrier. nevermind, my goal was to gain experience and in the last final I just wanted to produce some clean laps. This was my fastest run of the day with modified and I really liked the car. Some more driving with this modified setup will really be beneficial for me as I totally lack experiences for the last two years driving modified on carpet. Final wordsThis trip was a blast. A 2.5 hour drive from home with my family staying at a nice hotel (Slovakian standard :) ) made it all fun. I had a chicken sallad for dinner, some good coffe at the resturant and made new friends at the track. This was not the last time at this track - This was the first outing there for me in many more to come.
I´m really happy for the helped provided by Alexander Hagberg but I´m also proud to have a good realtionship with Henrik at Minicars who 110% supports my hobby with Futaba and Xray gear. I´ve allready mensioned Zombie but if you are in to buying new batteries or motors - Try them, they won´t dissapoint you! All the movies, setups and pictures are on the menu to the right. |
Traxxas TRX4 - Build log, PART V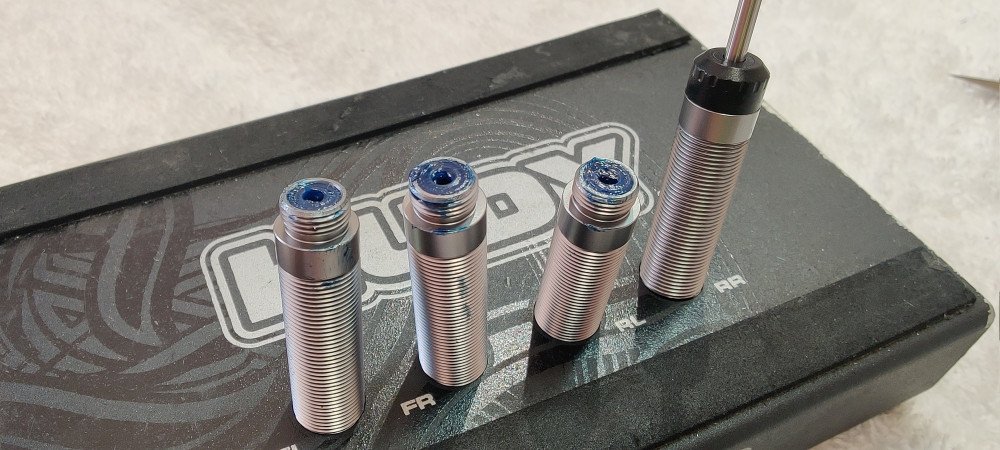
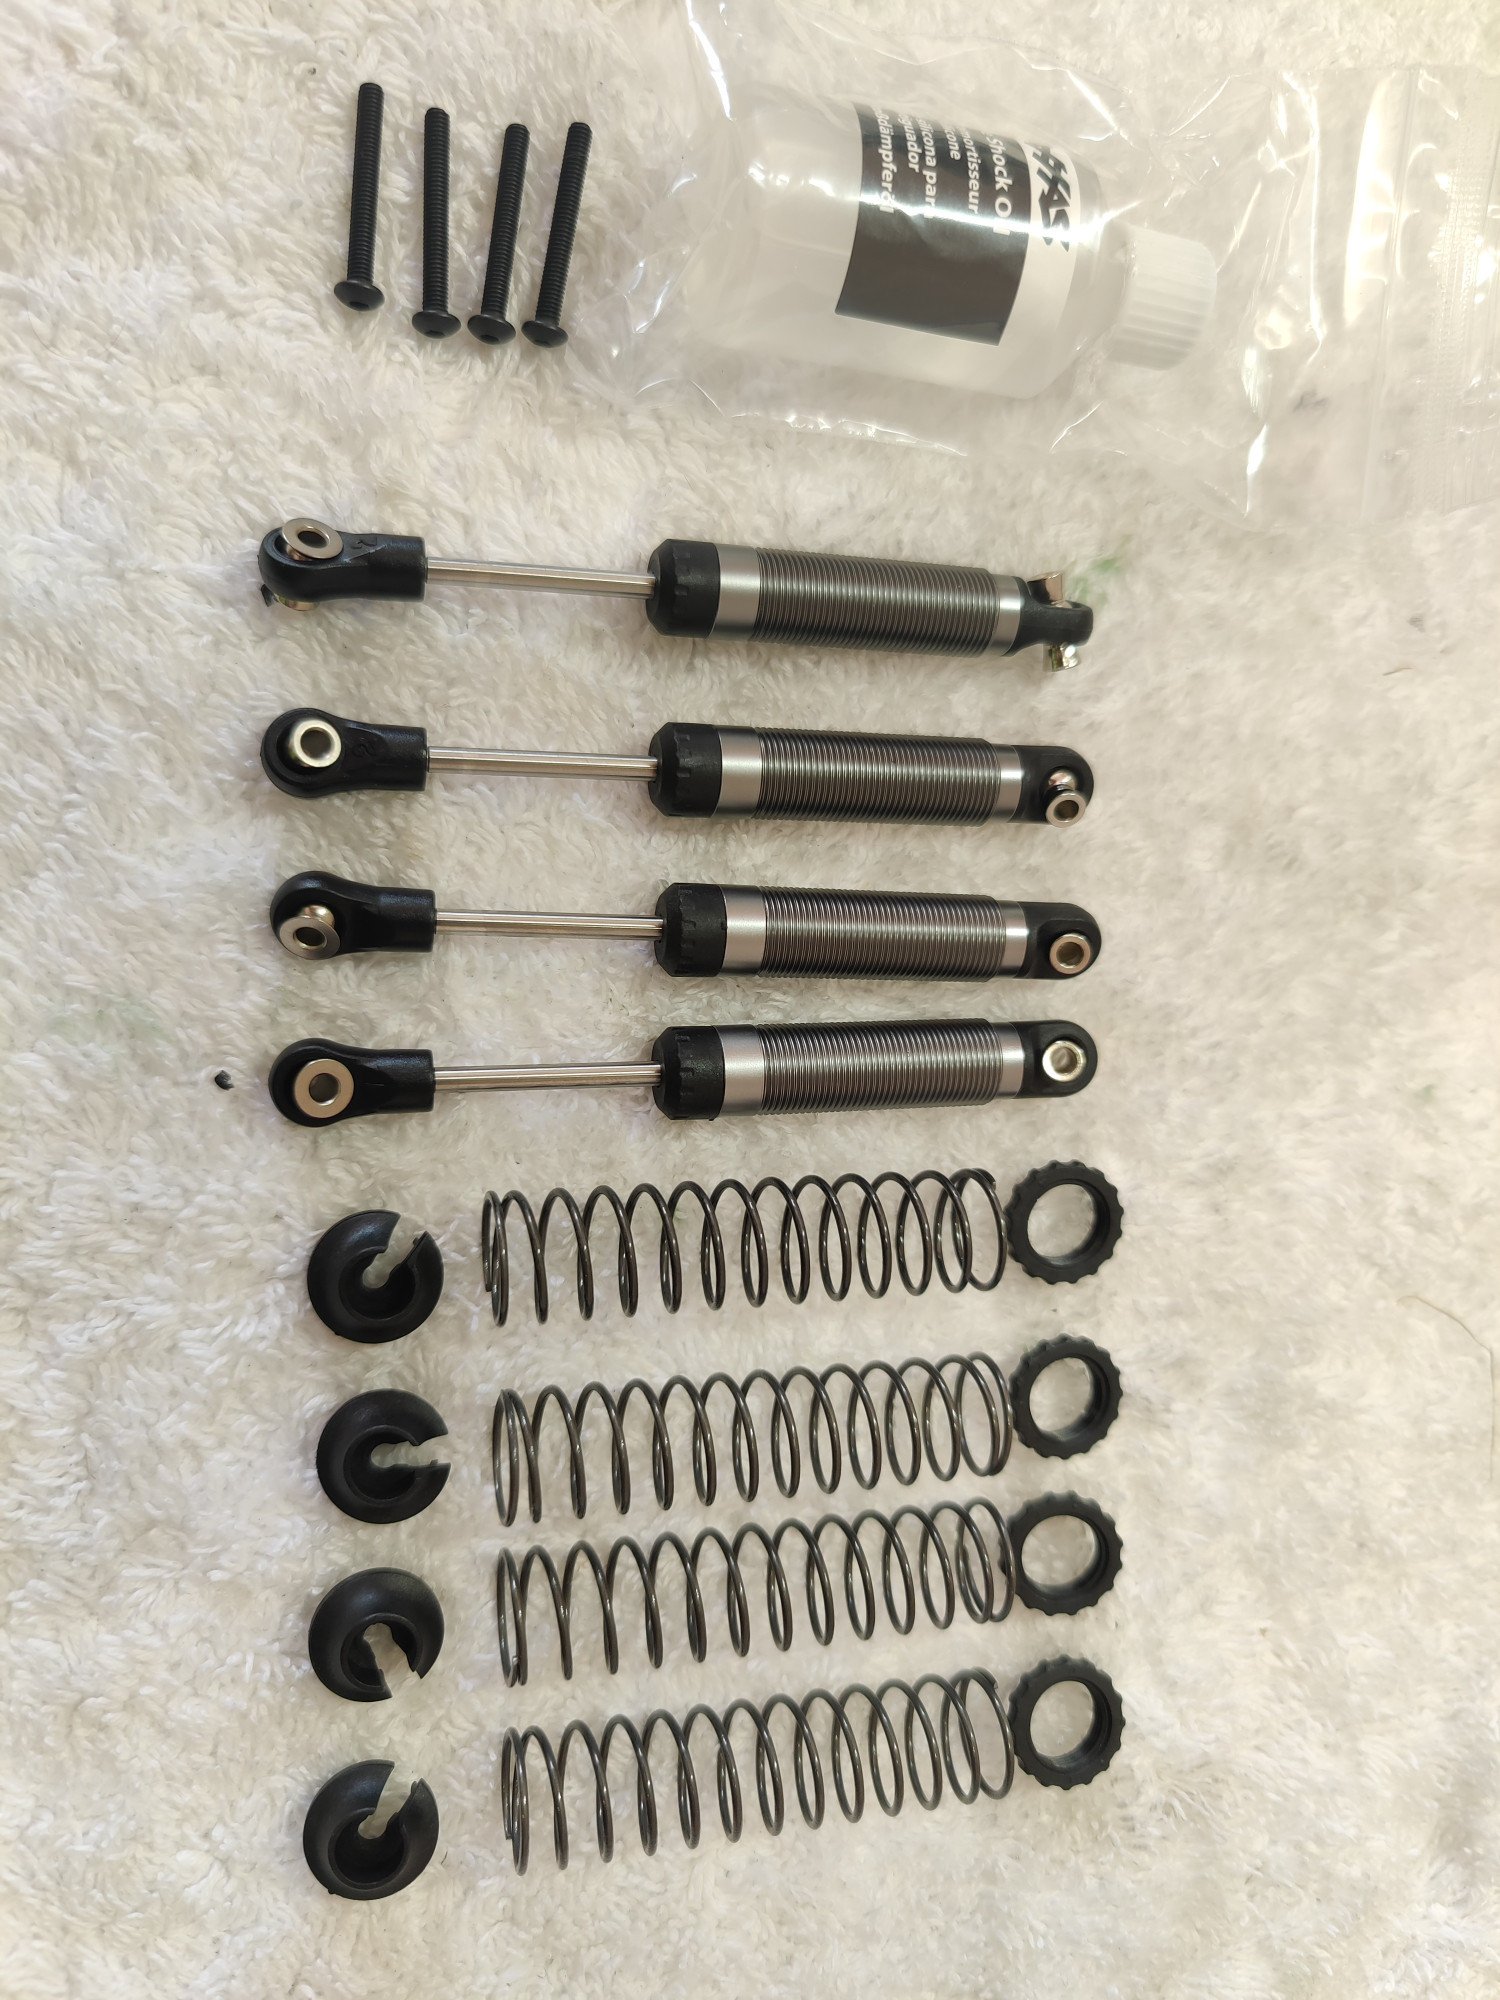
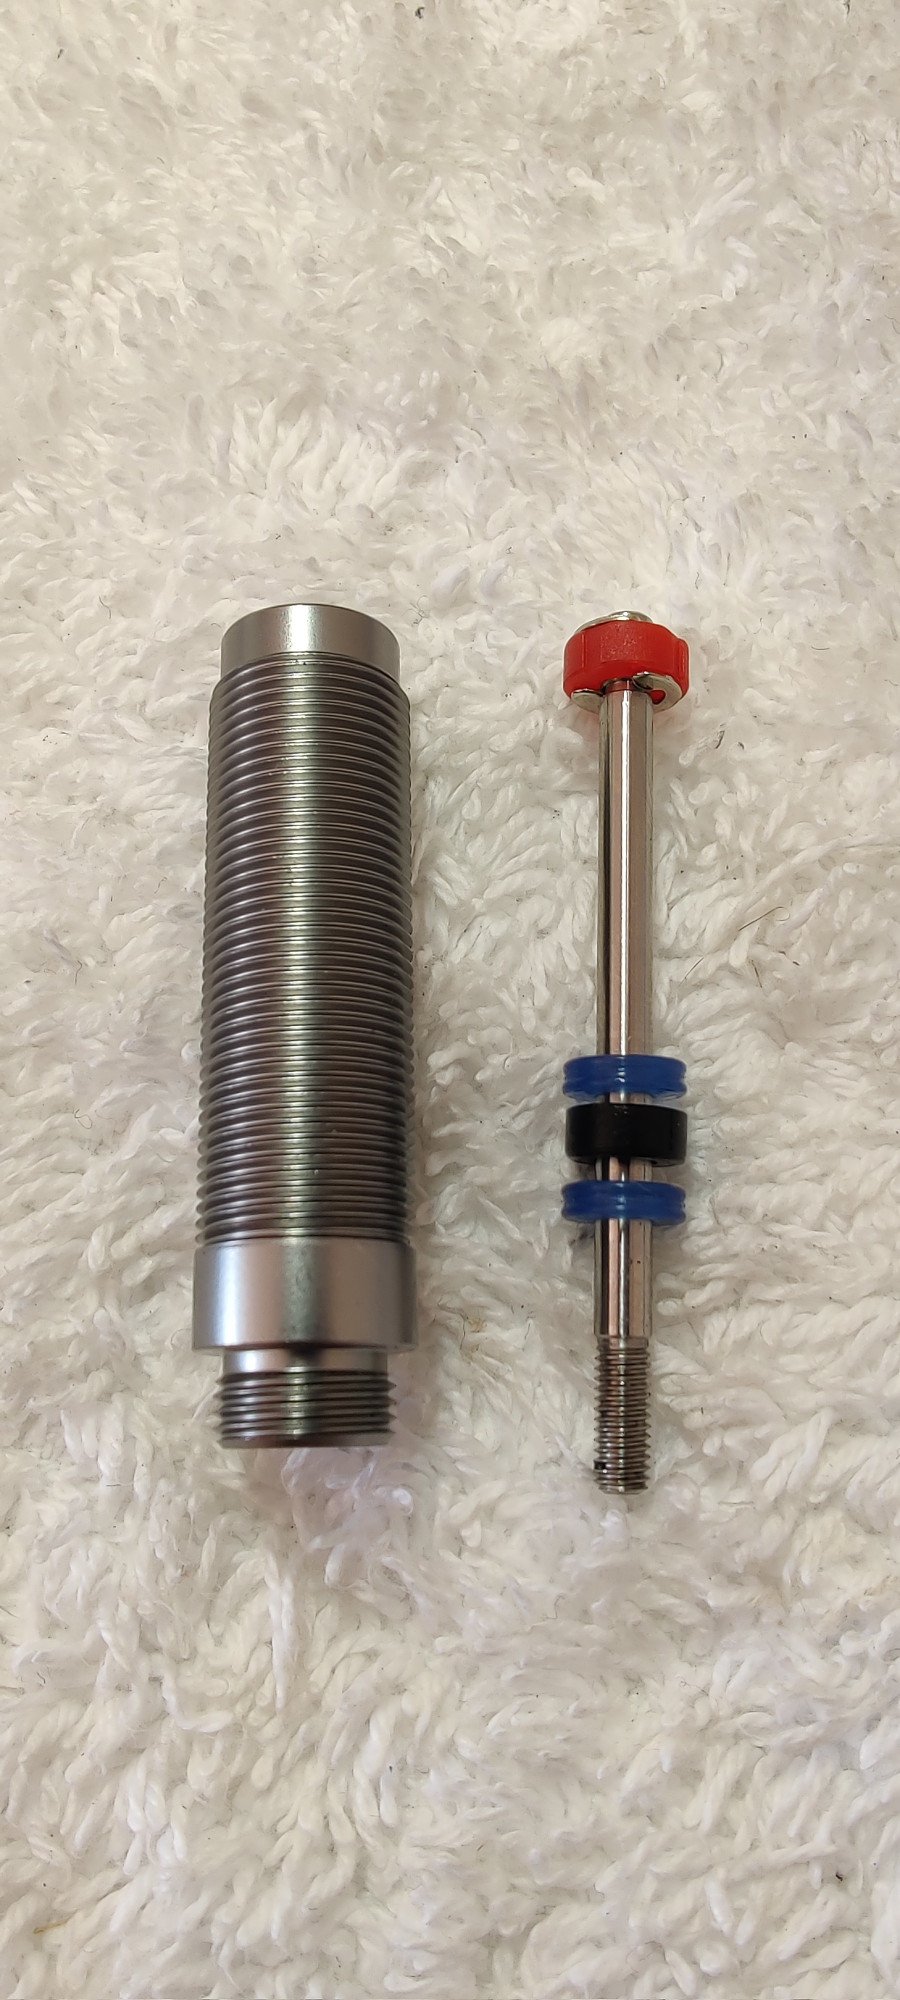
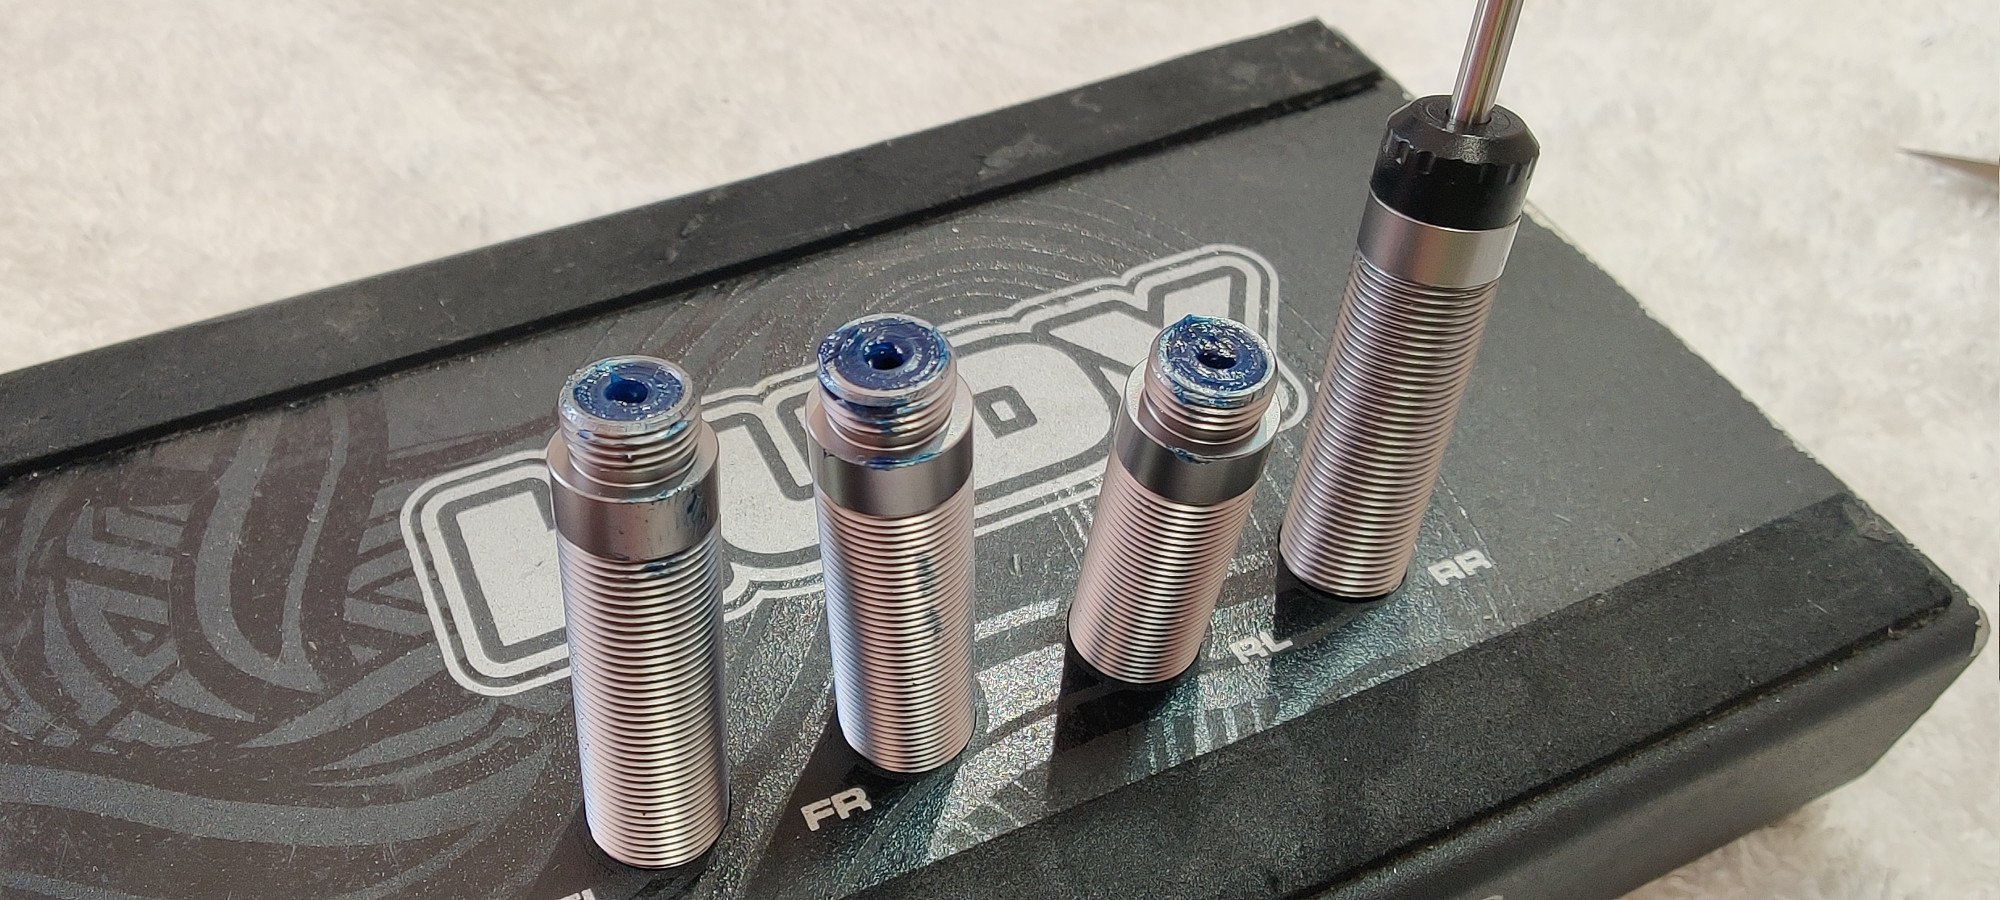
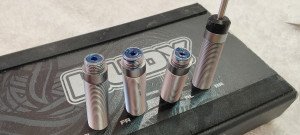
Shocks… One of the most hated stuff amongst builder?Shocks have a love/hate relationship to most of us. We hate messing with the slippery silicone oil but we love the performance of a good shock-setup… Anyway, the shocks in the kit are pre-built. Oil is included. However, I found them not as smooth to be to my likings so I had to dissasemble them…
Here is the insides. You can see the red valve, piston and the two seals surronding the bushing.
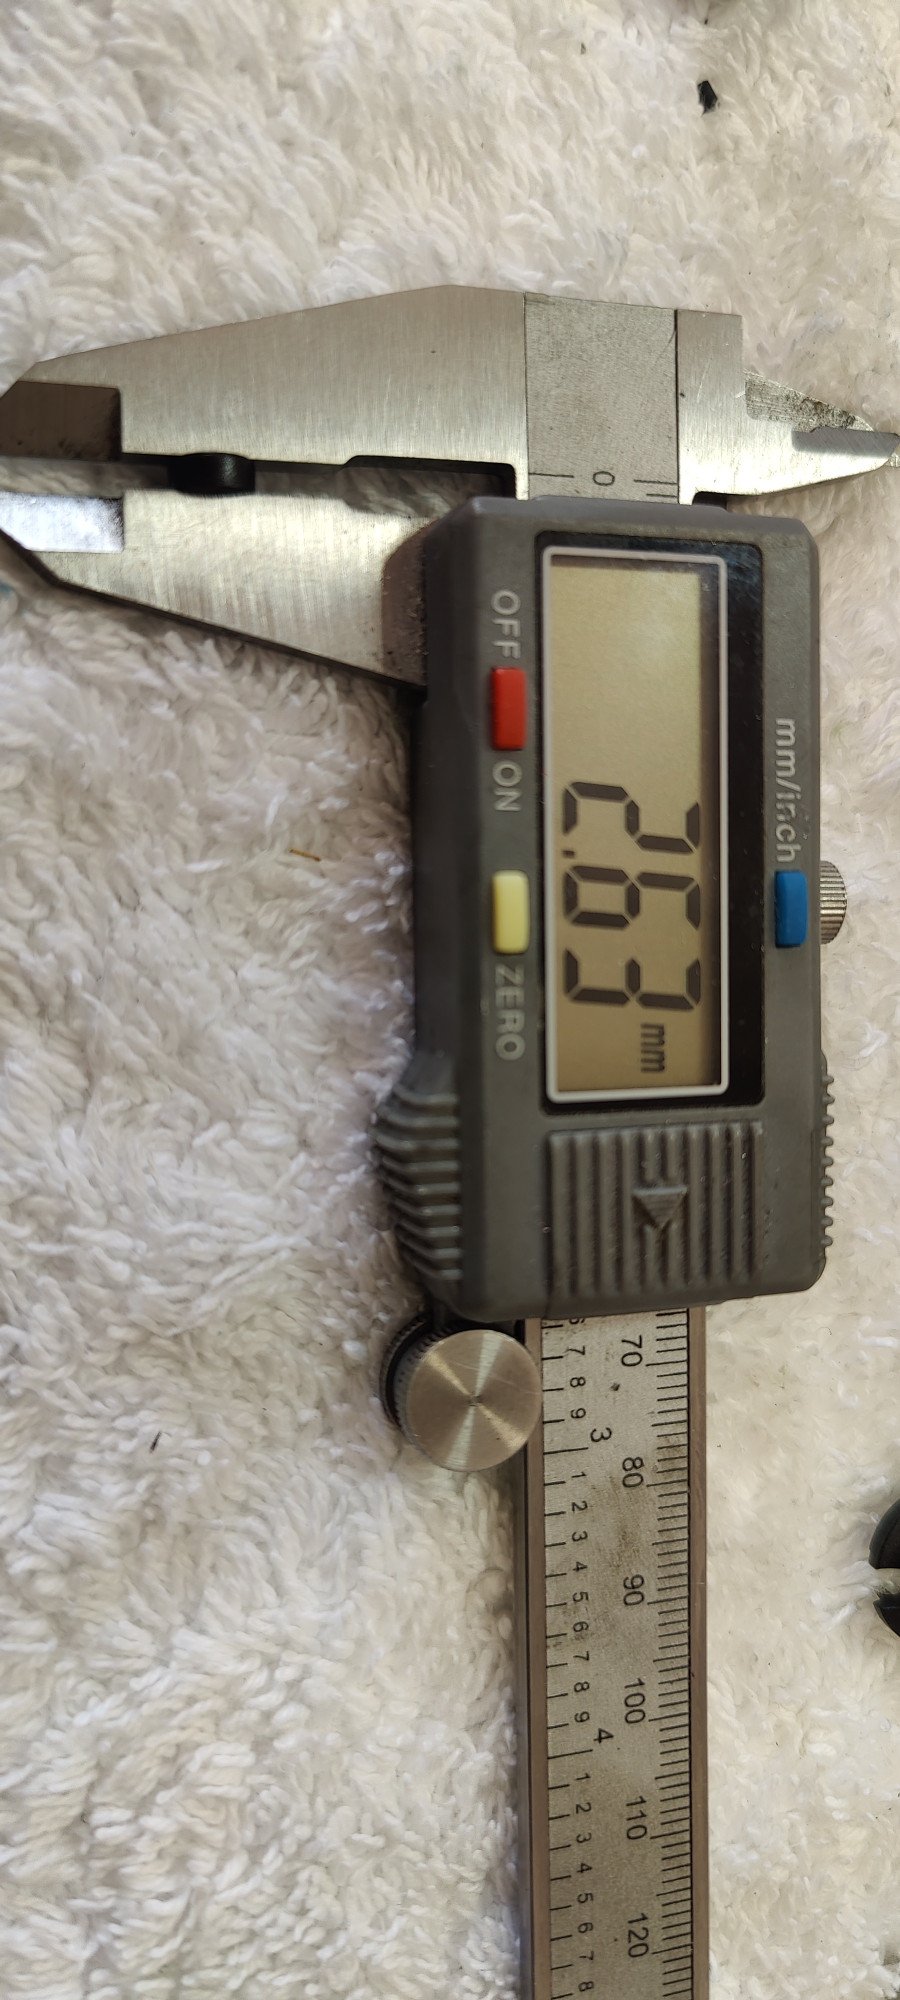
I found the original bushing being the problem. If you tighten the nut holding the seals in place the shaft the orings pinched around the piston making it hard to move. If you instead loosened the nut about half a lap everything whent smooth. I tried to change the bushings which originally is 2.6mm to a 2mm from Xray I had laying around. This deffinetily solved the problem.
The o-rings and bushing got some silicone grease on them before everything was put back together. Add a drip of oil on the piston before you push it through and you will have less of a chance cutting or damaging the seals.
Finally, fill everything with oil as per manual. THese shocks doesn´t have any volume compensating device inside so don´t overfill them! Then, you will have a bounce compression as the volume doesn´t compensate for the piston moving inwards.
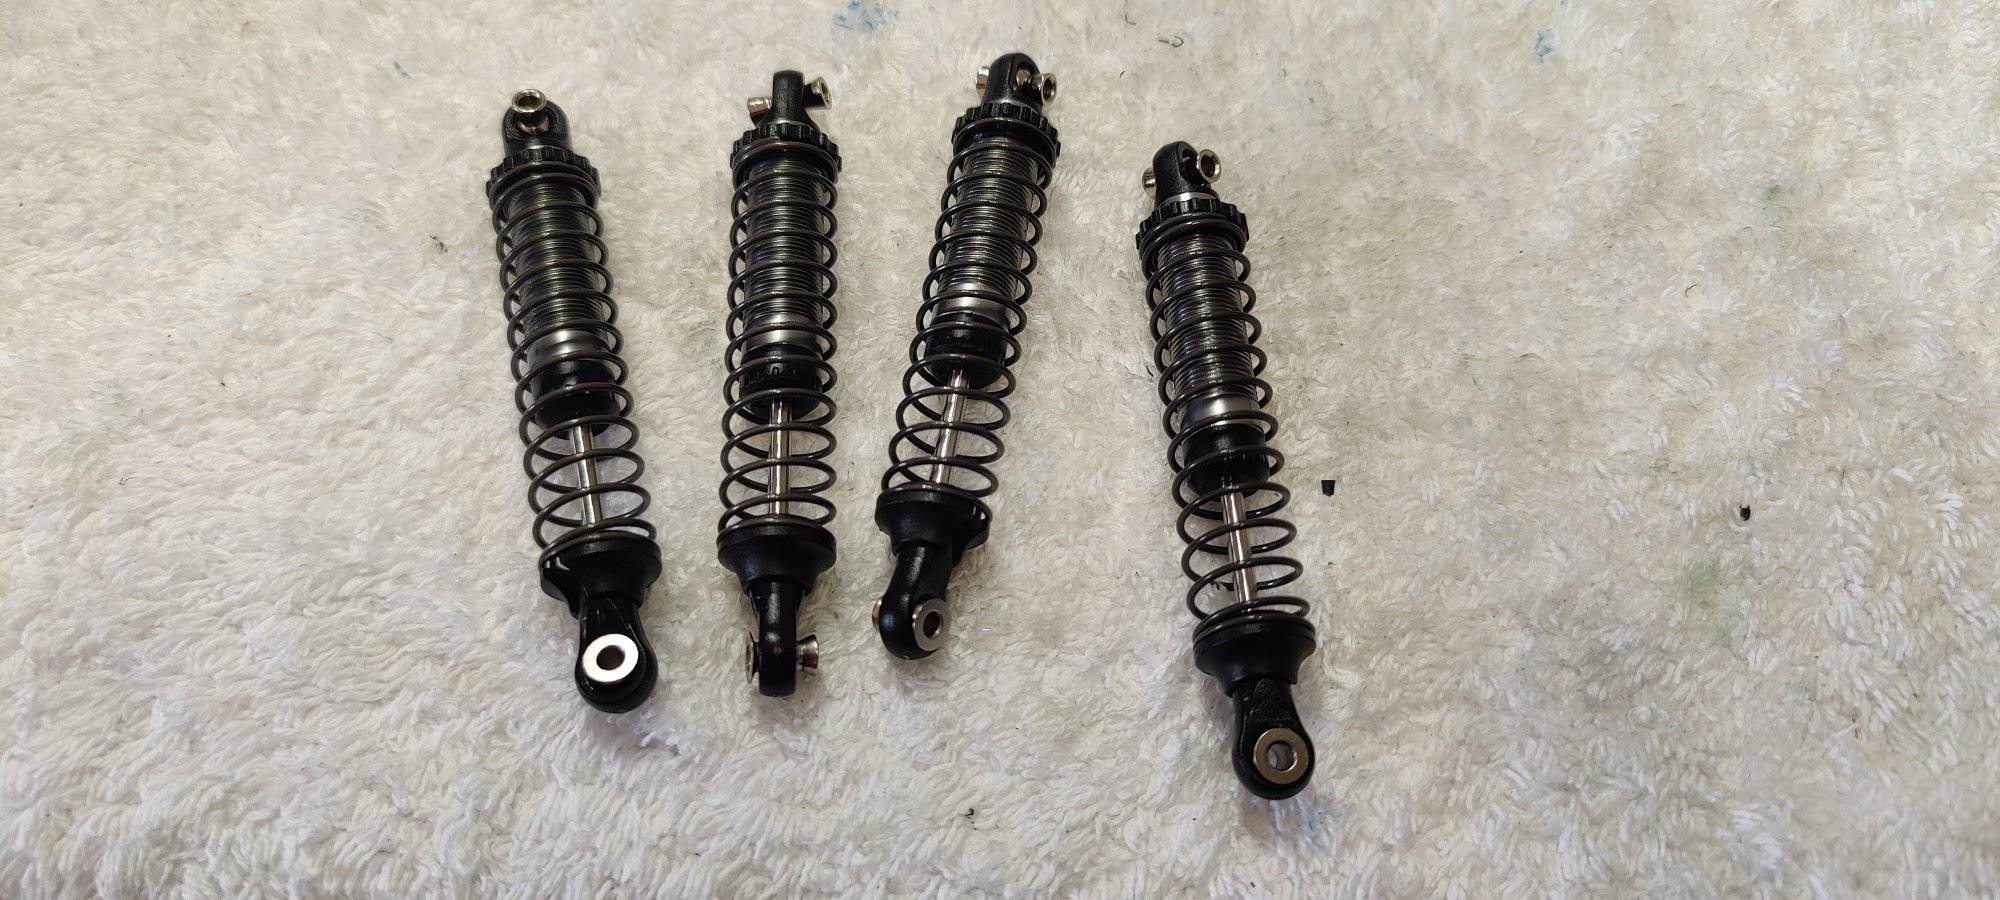
Time to put them on the chassis… Happy building! |
Traxxas TRX4 - Build log, PART IV
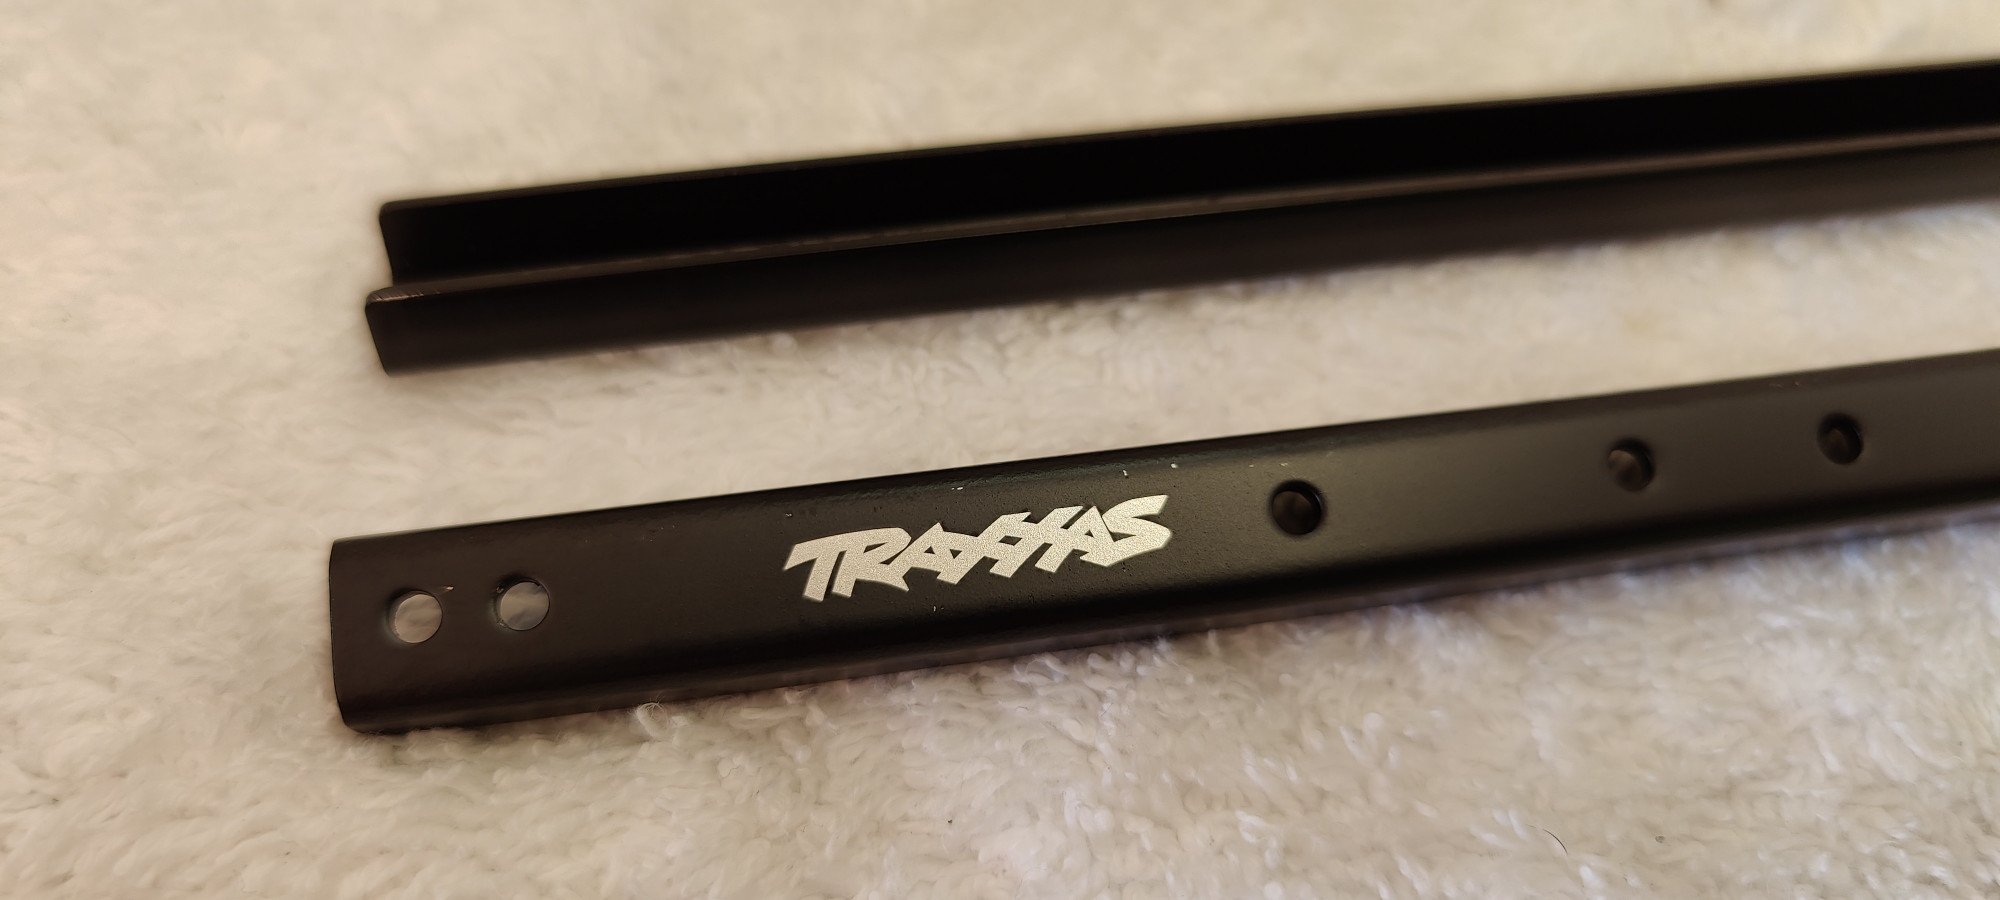
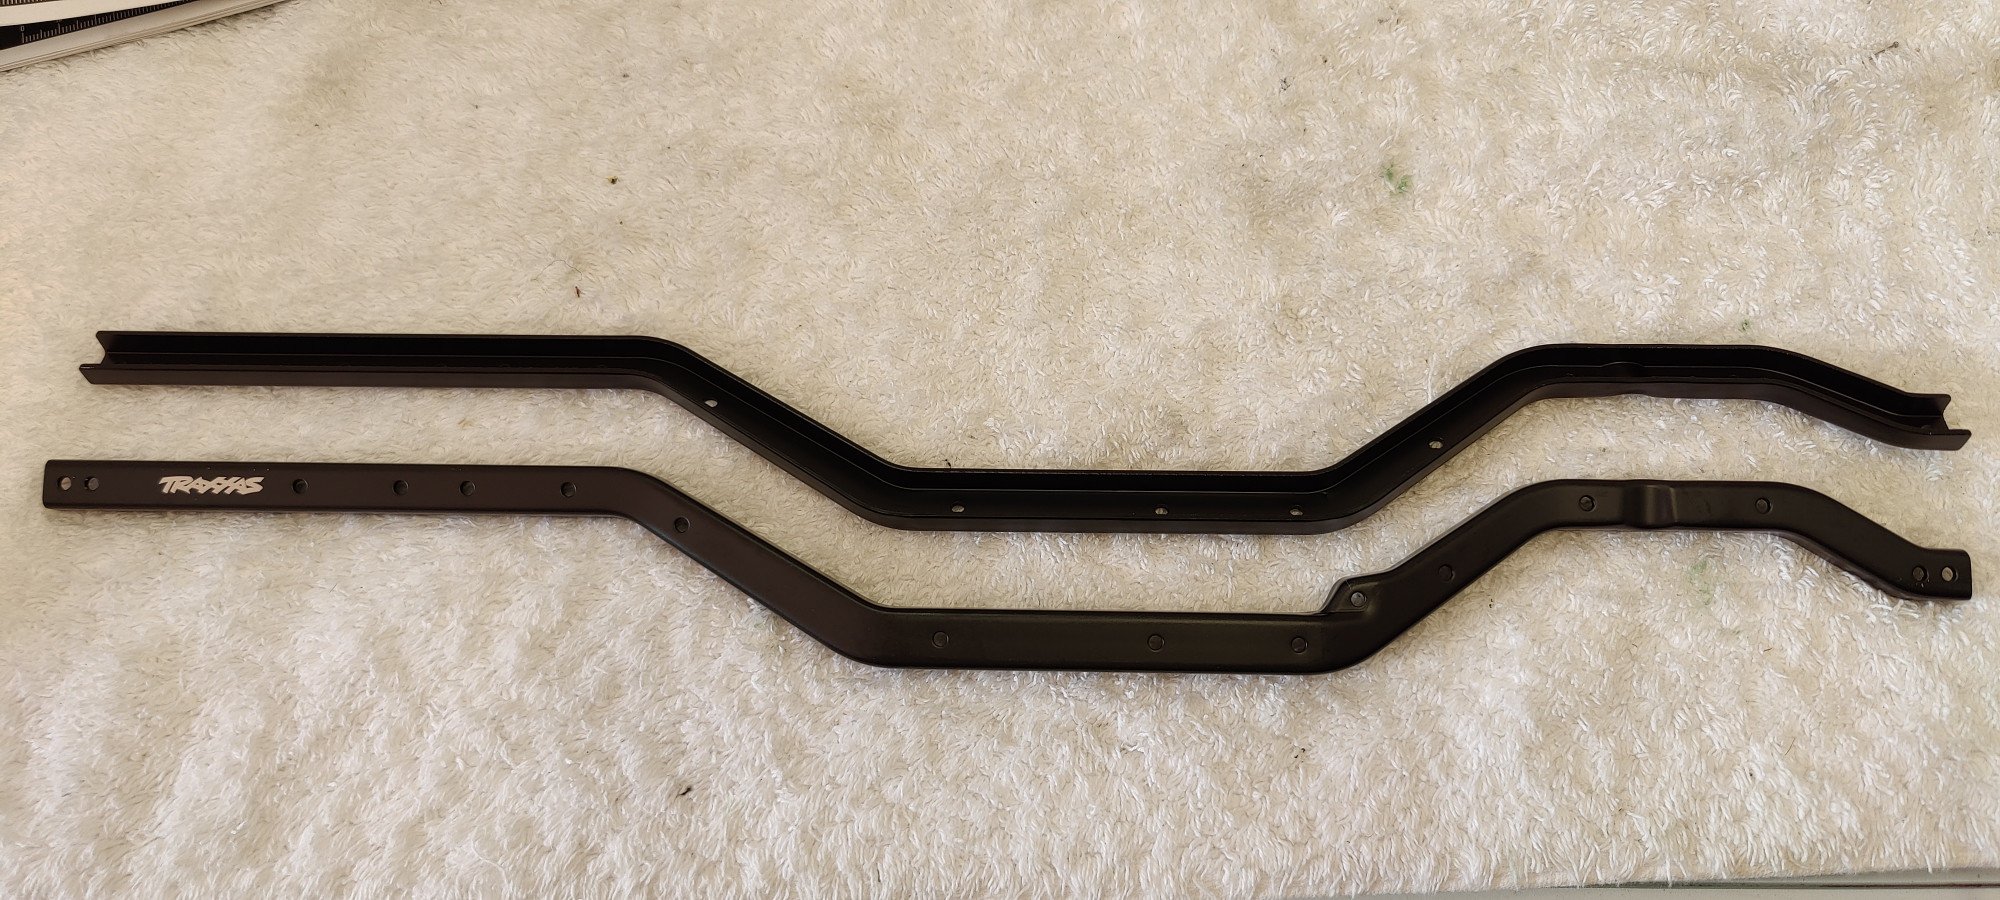
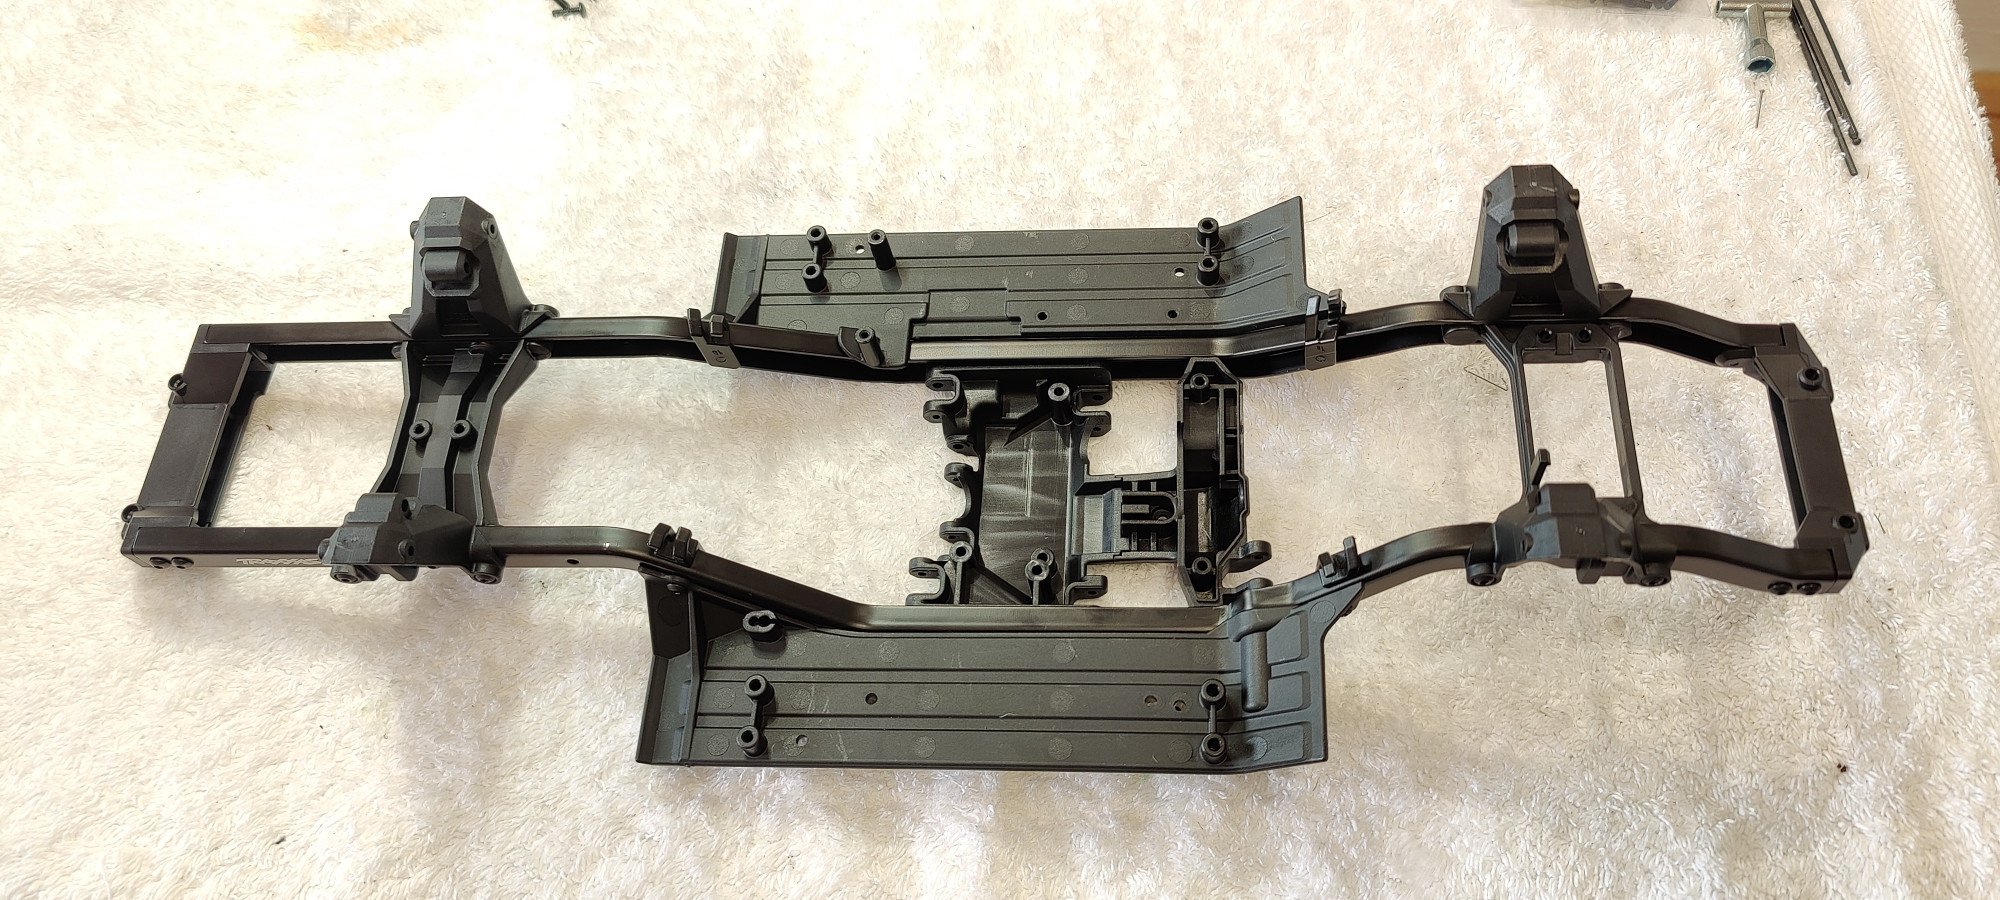
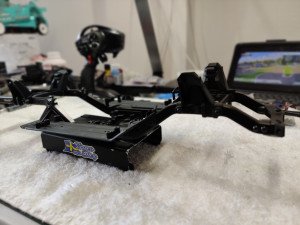
Chassis time!The frame for the chassis on the TRX4 is based on two beatuiful formed metal rails. They even got the Traxxas name milled in after being powder coated.
Here you can see the layout with the axles, rock-sliders, gearbox and joiners. Time to put it all together.
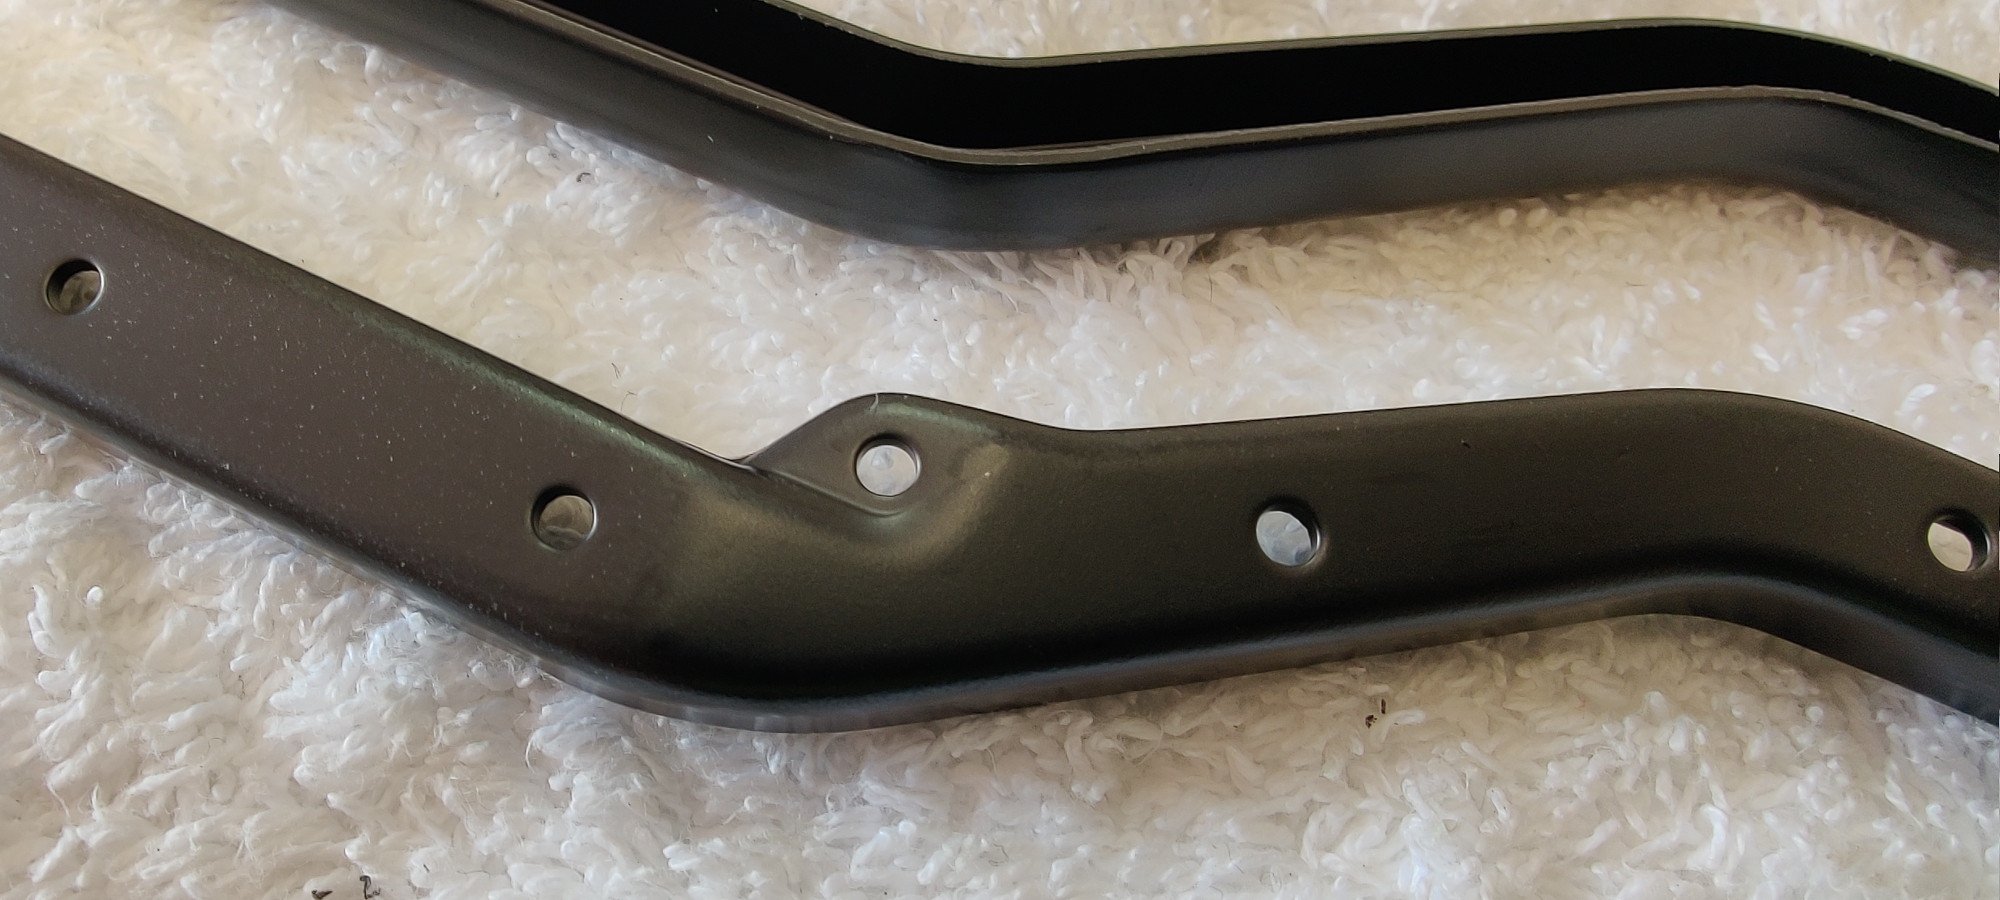
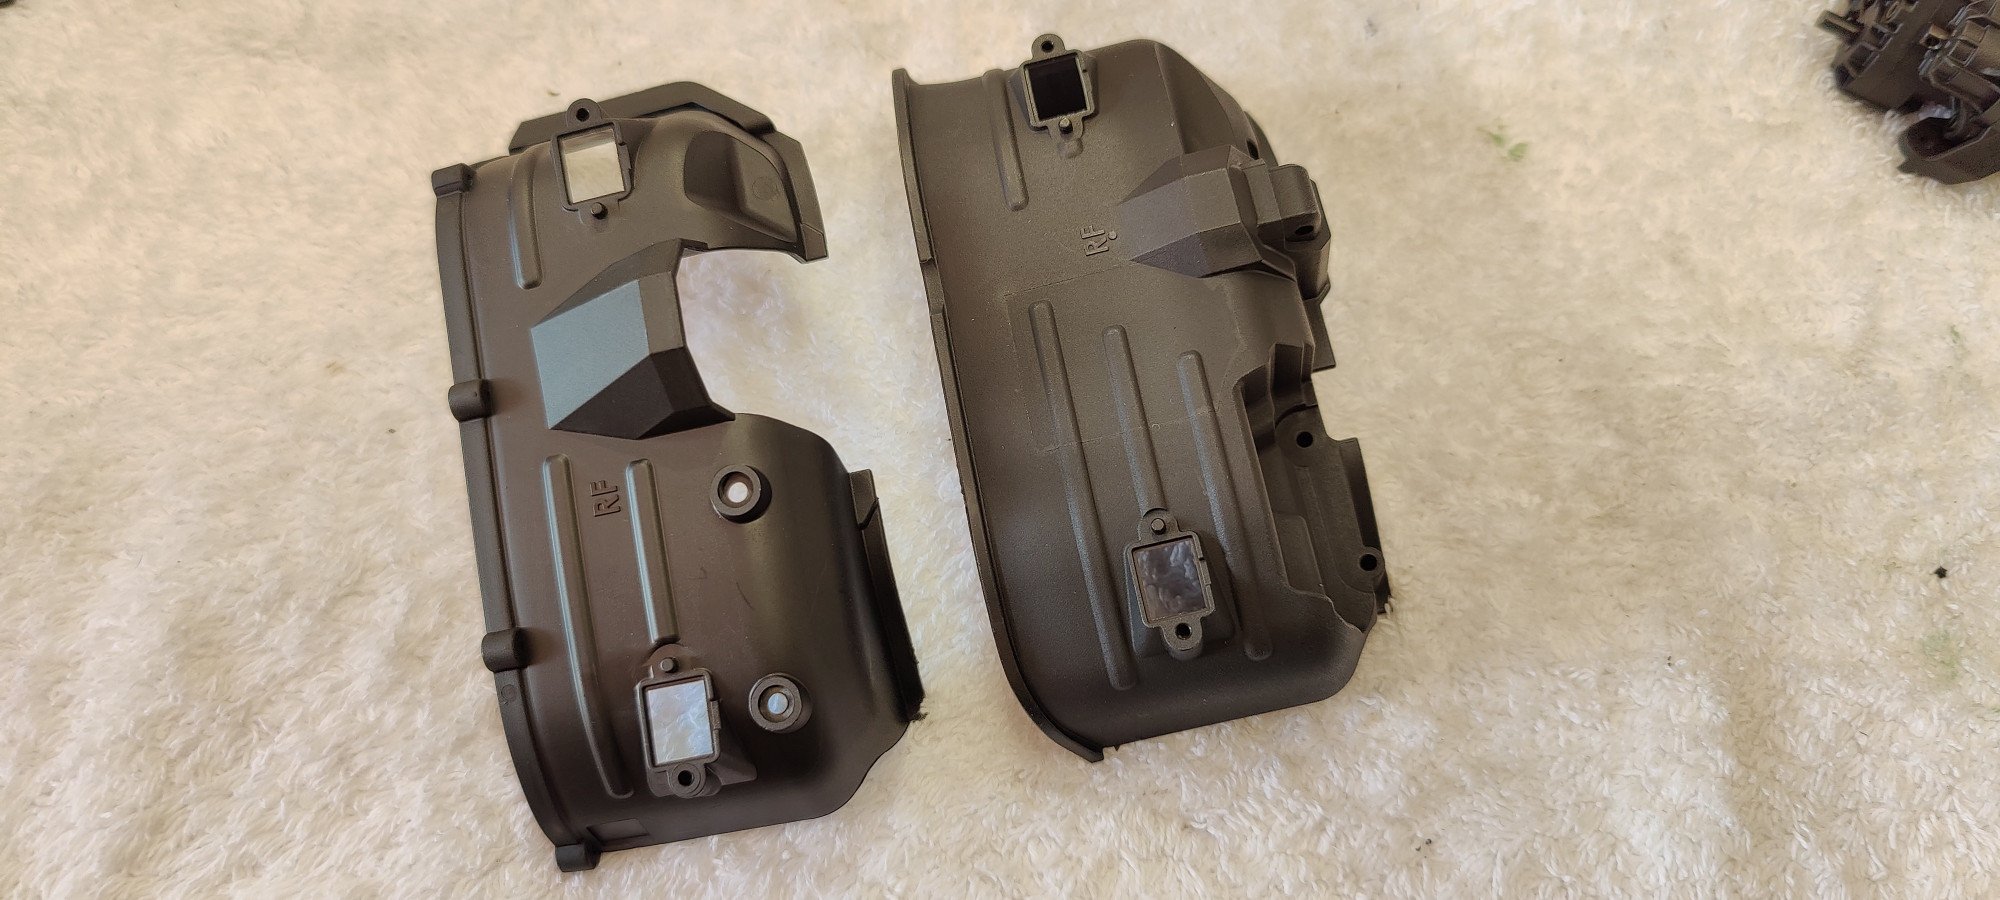
Inner fendersTo be able to use the Landrover body you have to change the innerfenders. On the landrover these are attached to the body whereas on the TRX kit they are a part of the chassis including the upper chock-mount. Part number 8018. Please be advised , the shocktowers are included in the long wheelbase extension kit. If you skip that kit you also need to buy the towers separately, part number 8216.
The option fender on the LEFT and the kit fender on the RIGHT.
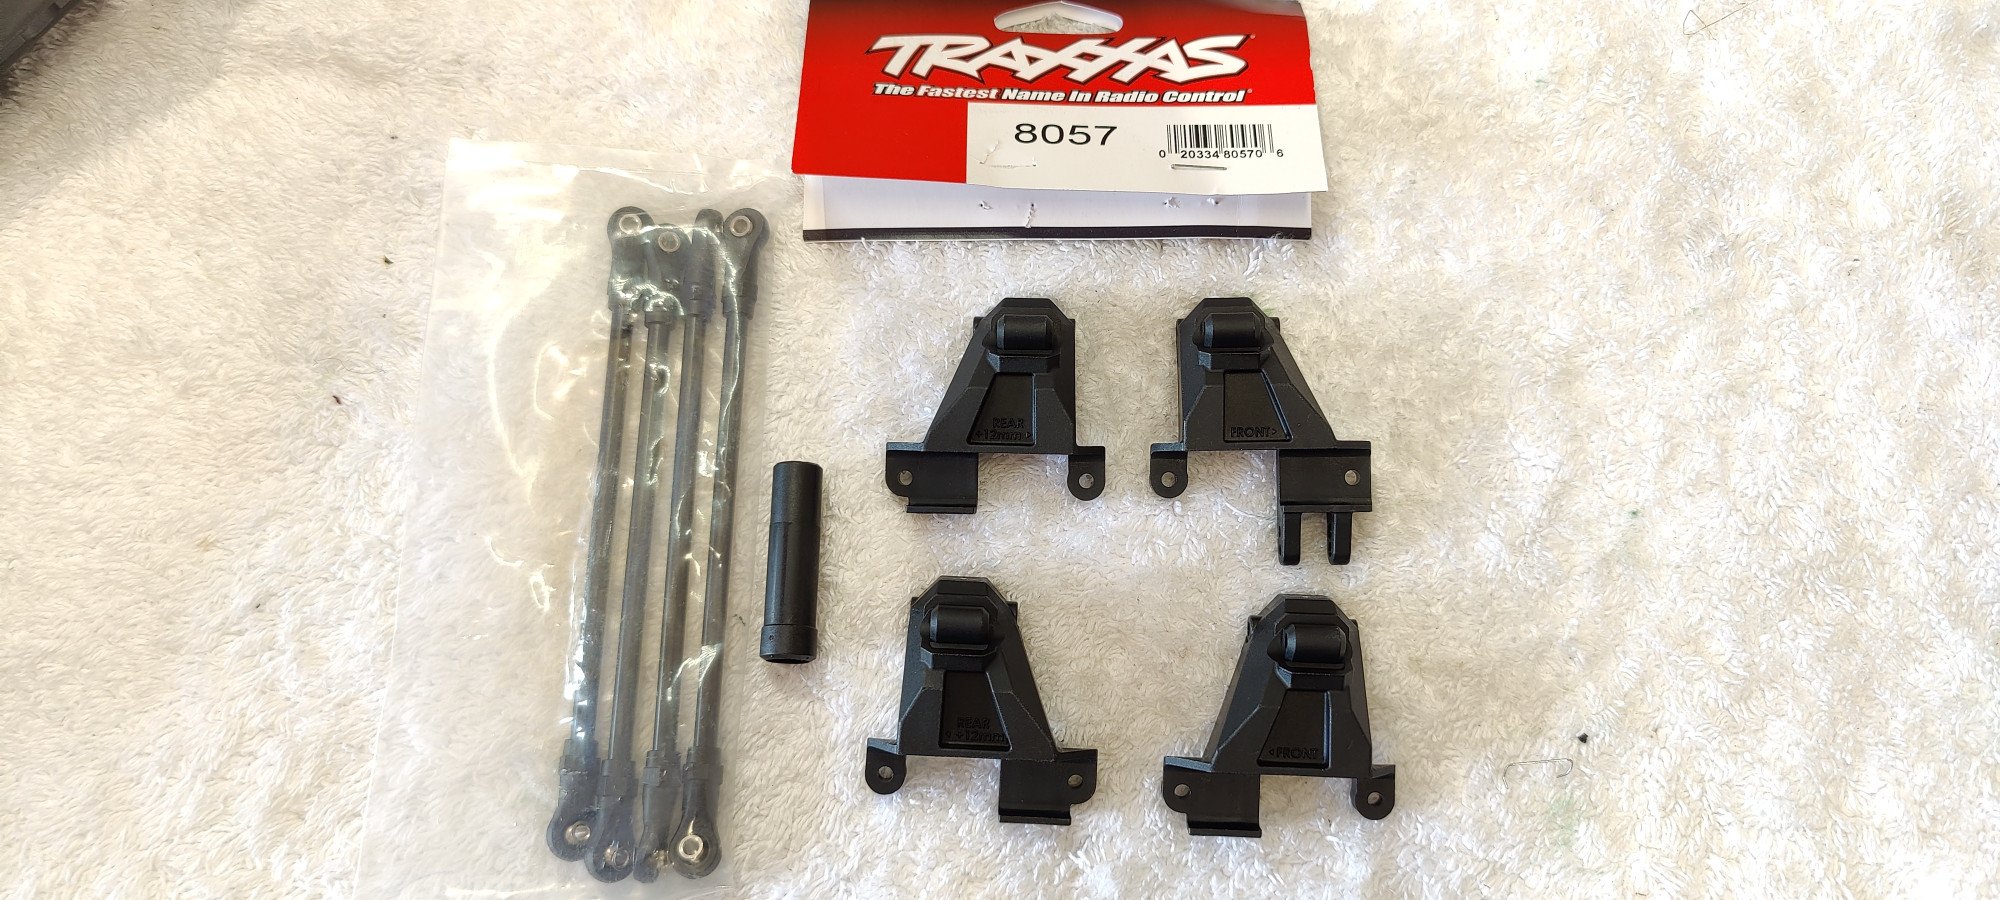
Long wheelbaseThe TRX4 can be build per quite a few different wheelbases. Check the manual for the body you are opting for if you need this kit. For the Landrover you need this 8057 kit.
The completed chassisThe chassis is finally built. No problems fitting the parts and the built actually feels like when I was young building those great Tamiya kits… Although the materials in the traxxas kit are way better than the plastic in the Tamiyas.
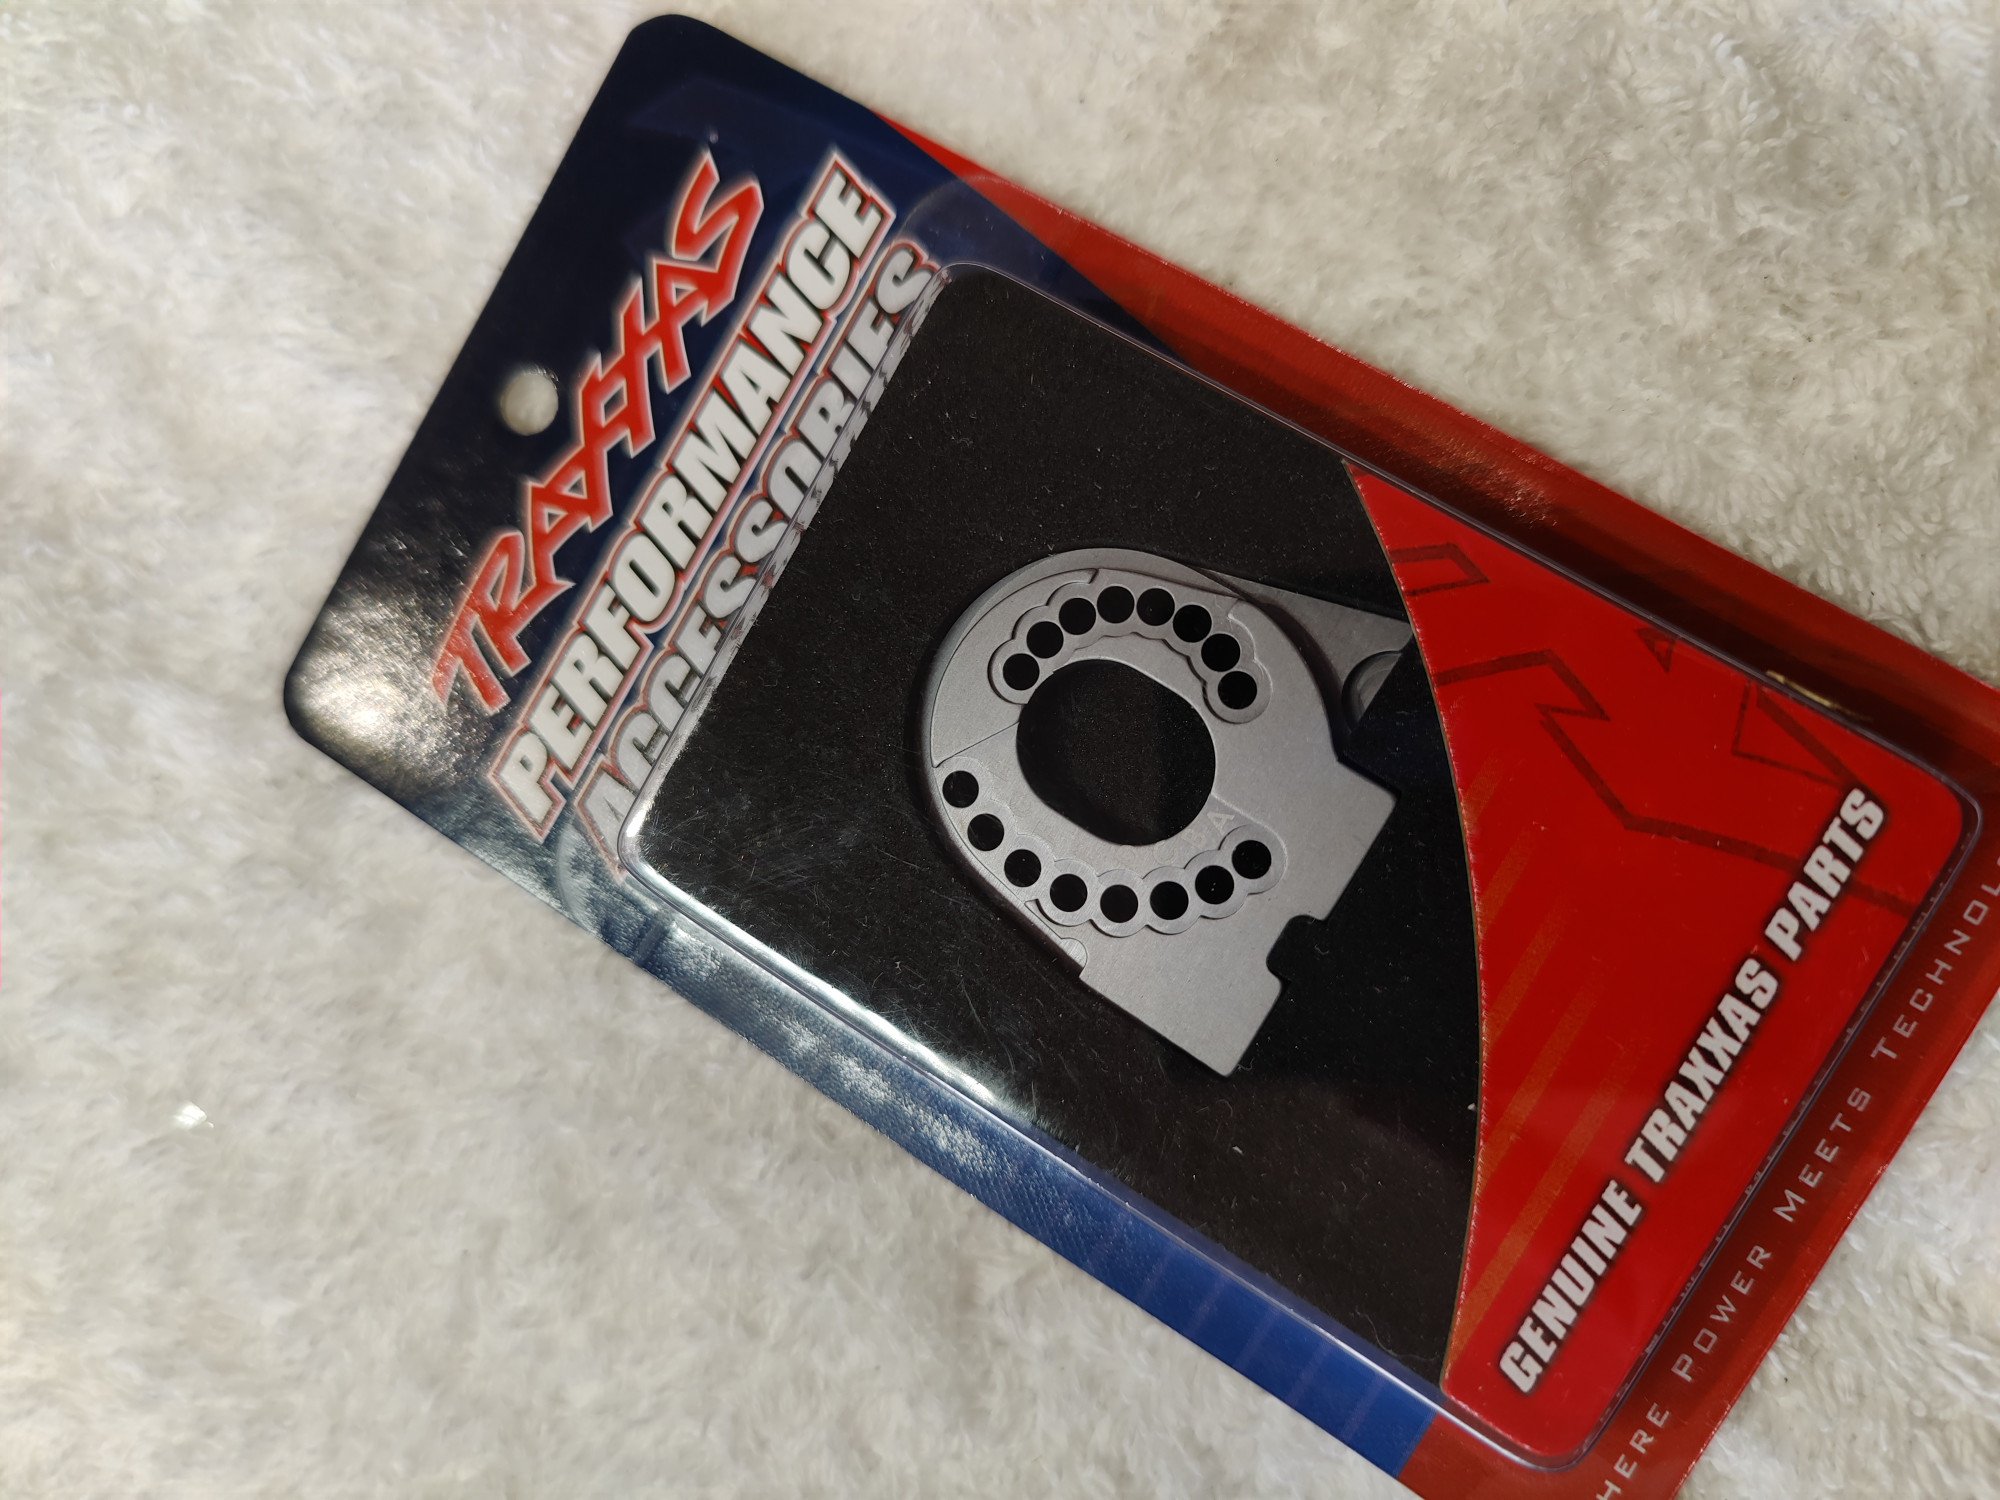
Option engine mountAluminum motor mount is a great option which I put on all of my builds. Traxxas has this part as an option and as I dont wan´t to disasemble the car after it is completed I opted to install it right away. The engine mount on the origila is made out of plastic.
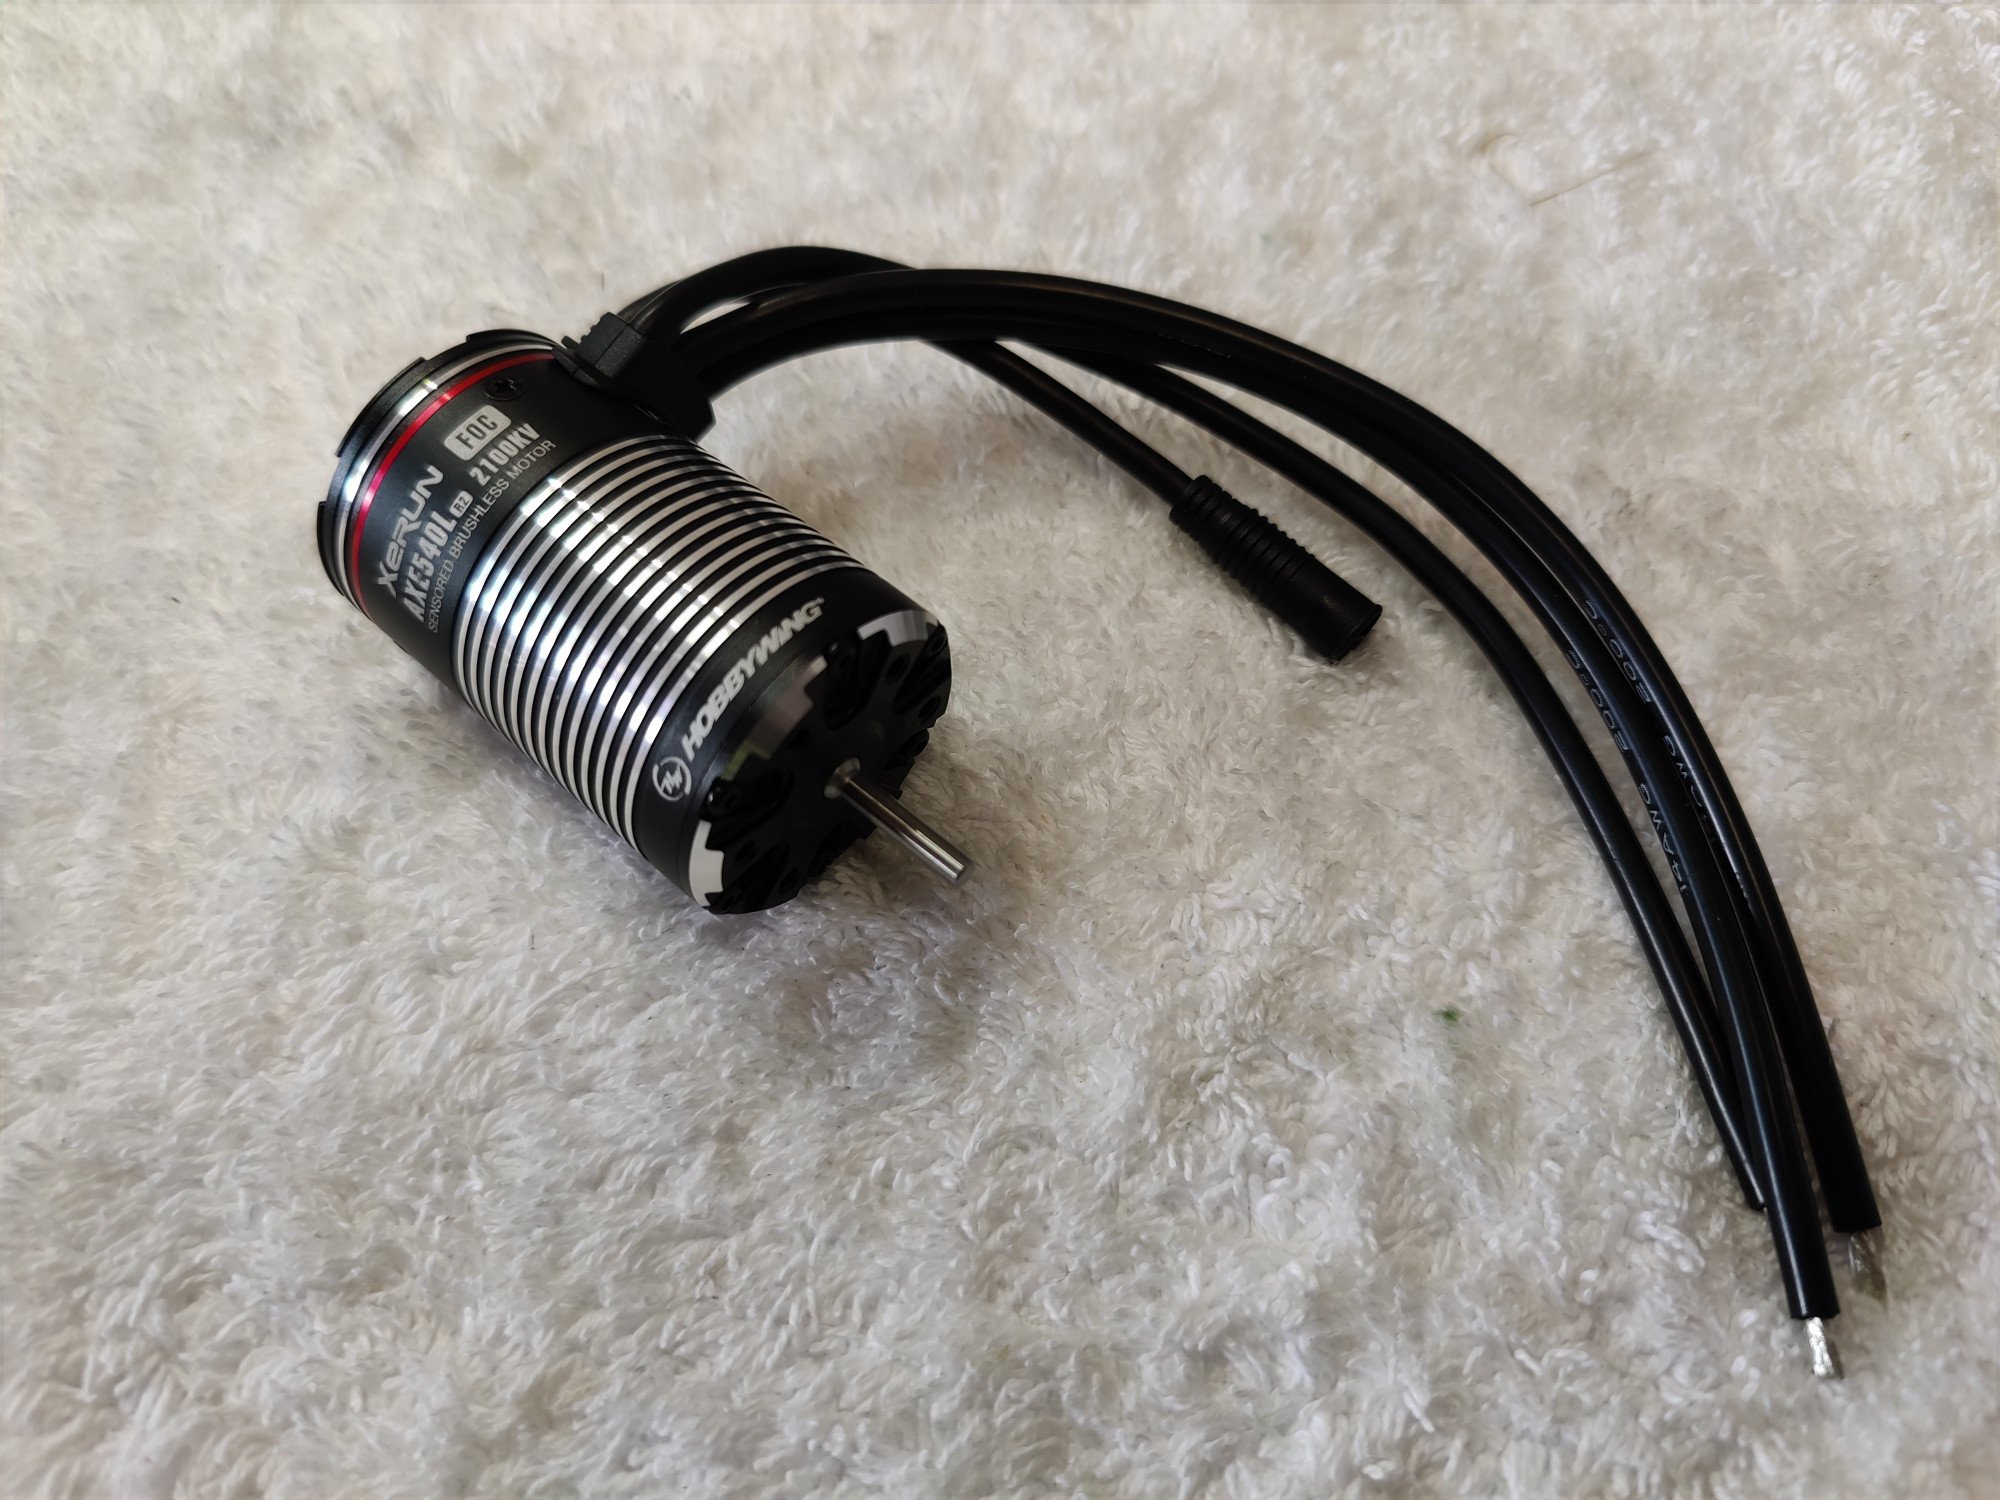
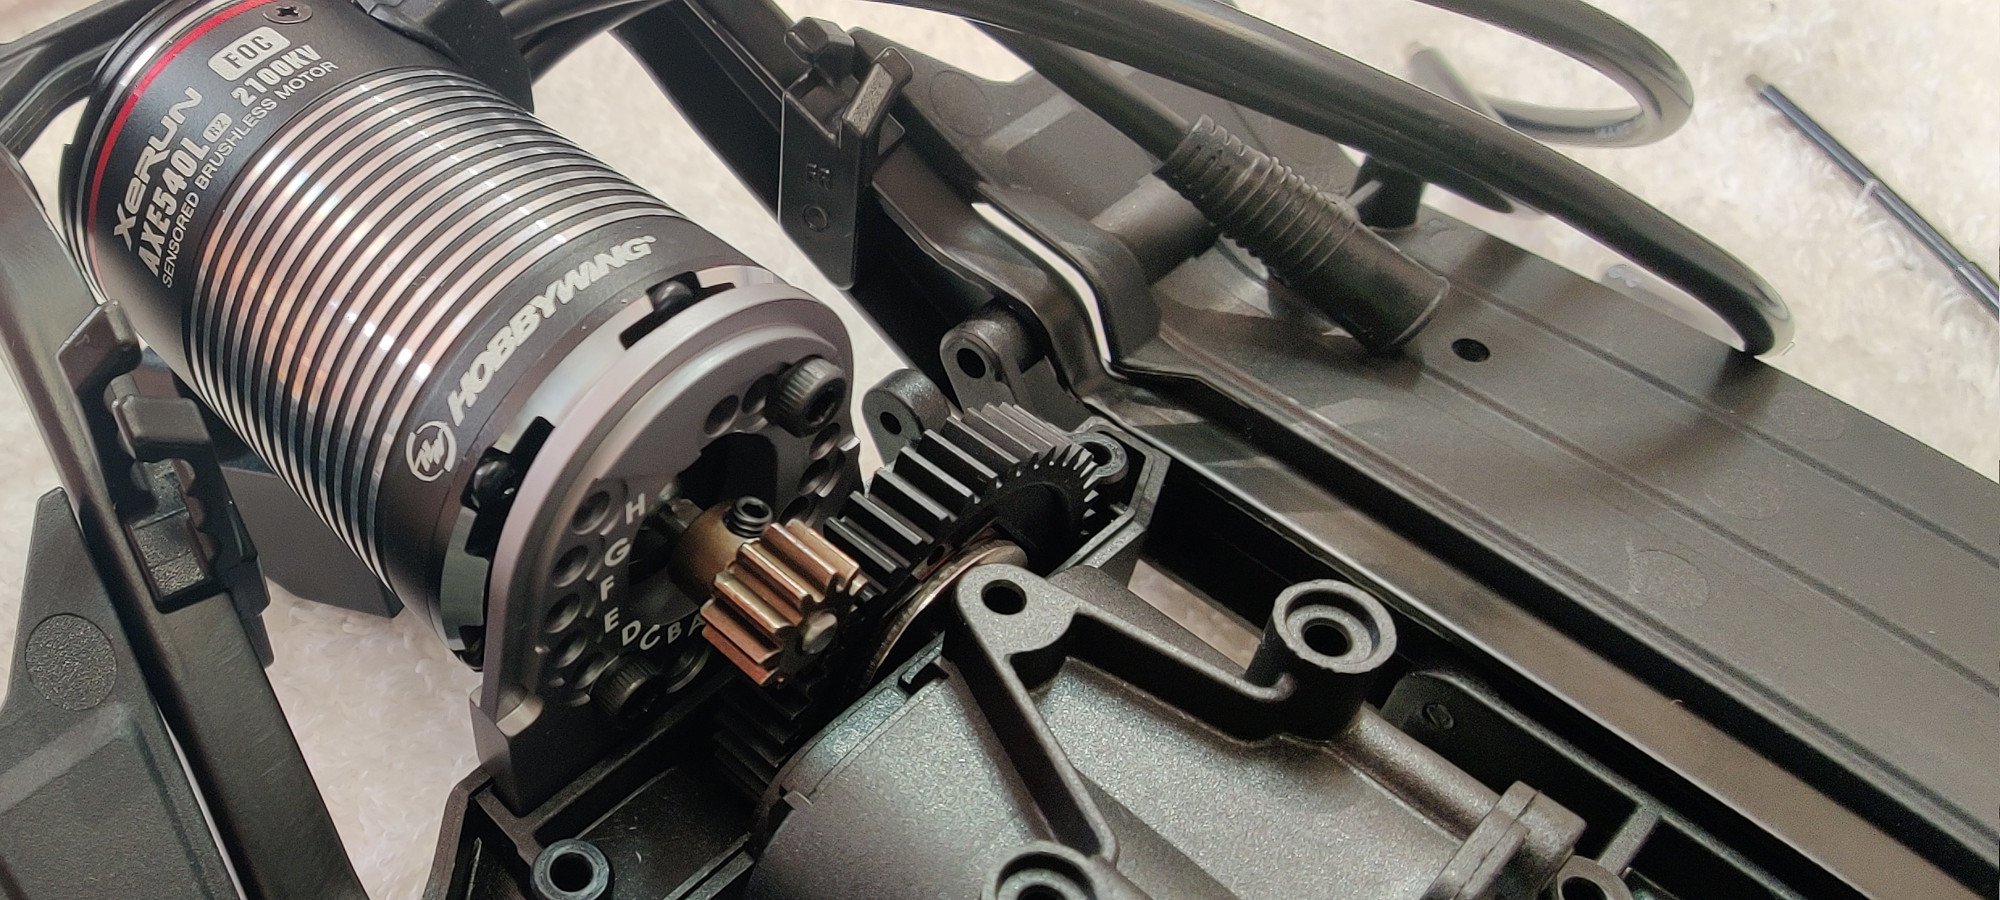
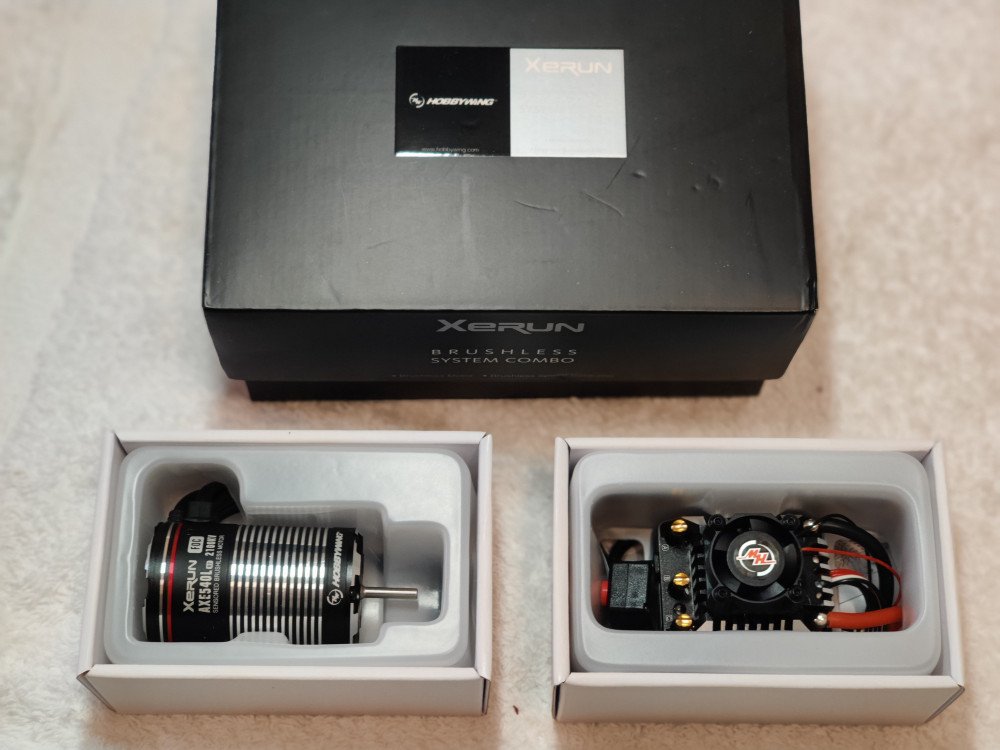
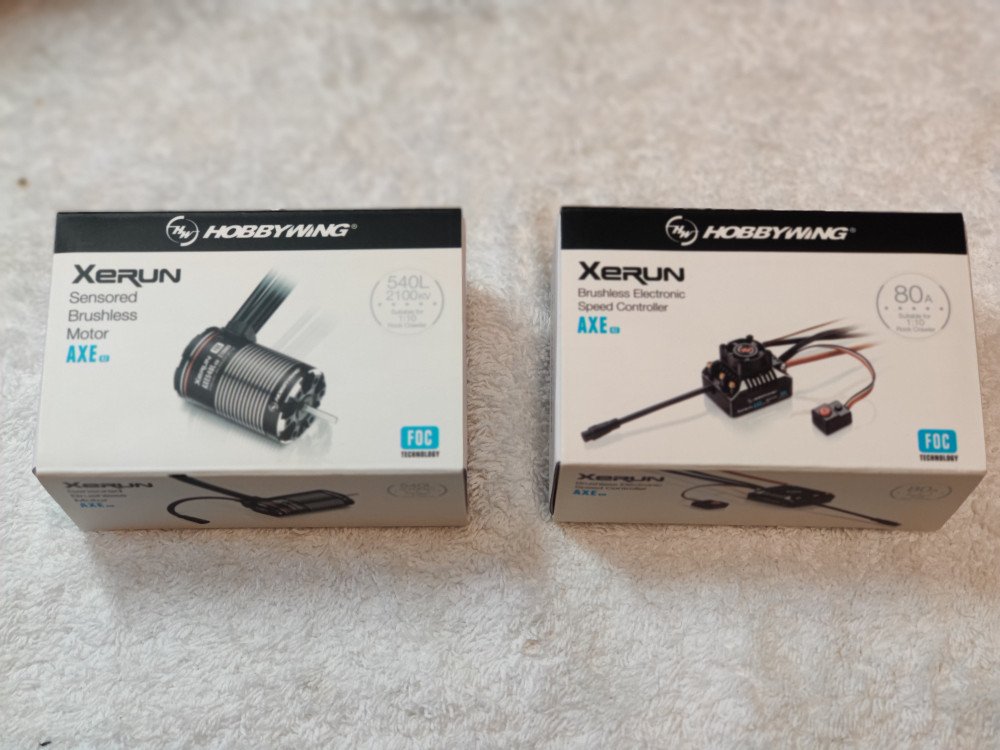
Hobbywing MotorThe XERUN AXE 540L that came in the kit has a Kv of 2100 and will probably be a little to fast to be a crawler - but hey, my kids will love the speed :)
Motor fitted in the gearbox. THe gearmesh felt a bit tight but it was no problems neither with movement nor the sound of the gears.
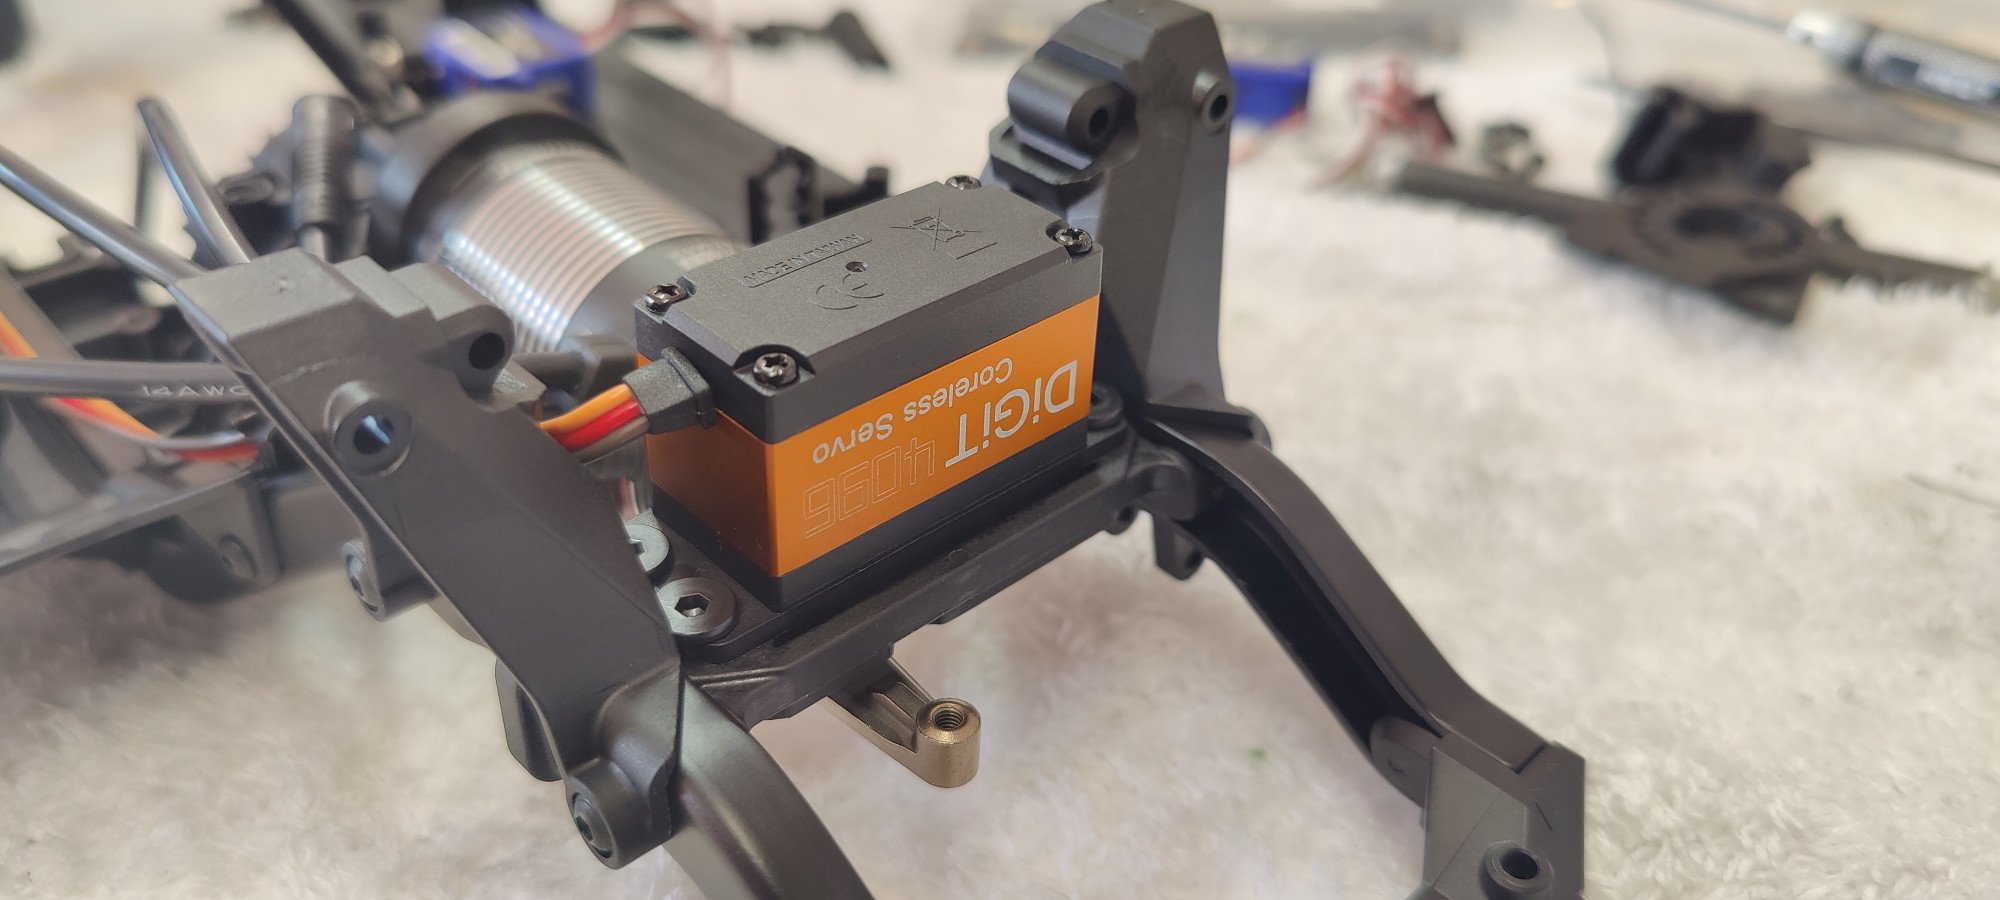
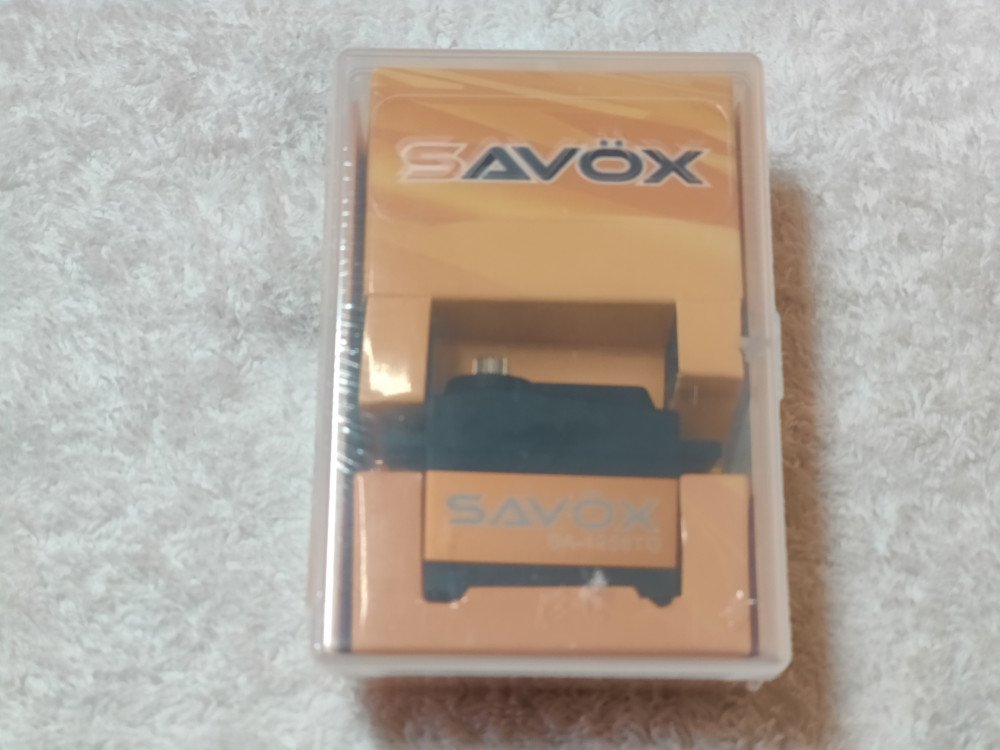
Steering servoFor the steering I swapped the original servo for a Savöx SC1256TG which have some really good numbers. Be aware that Traxxas has a sligtly bigger CC between the mounting tabs so you have to modify all oter servos for them to fit properly. It is an easy modification though. Aluminum steering arm is option for most models but standard in this one.
Next up will be the shocks! Happy crawling! |
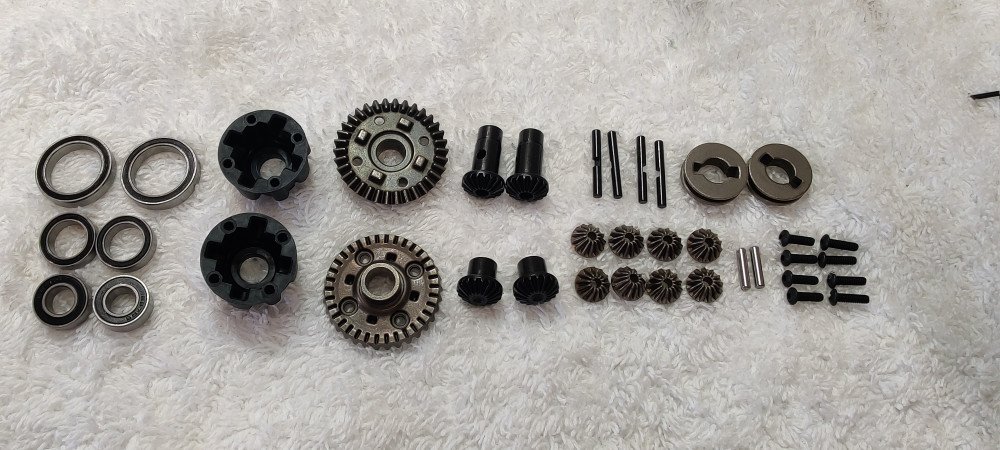
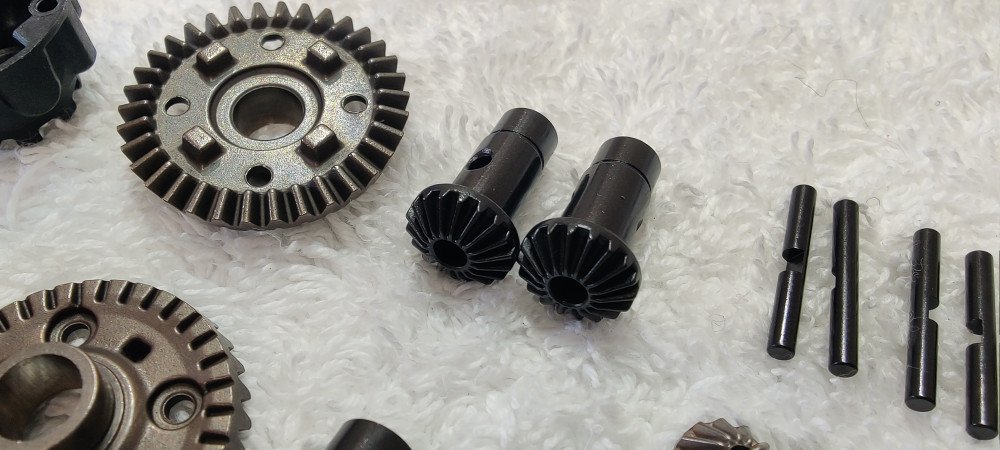
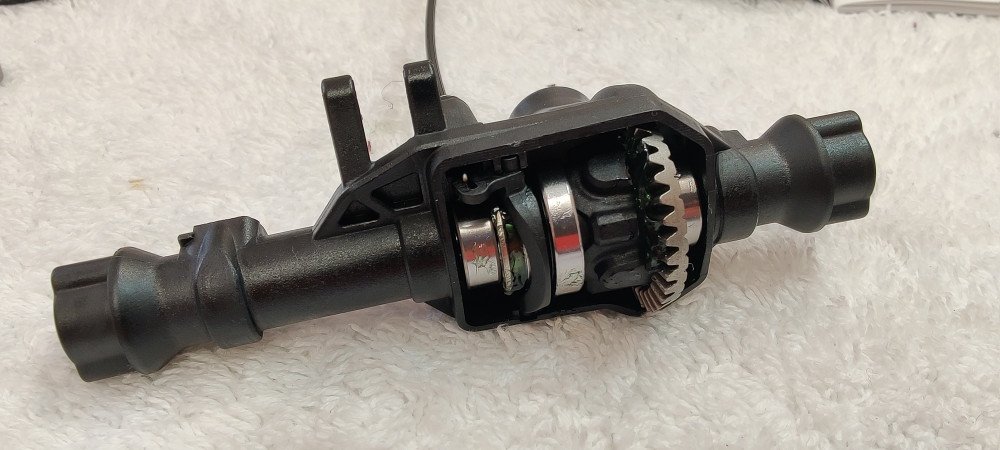
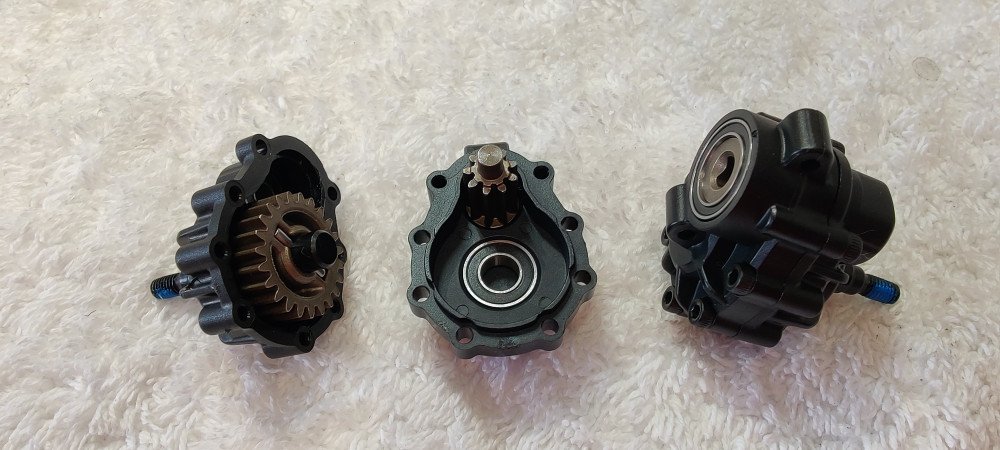
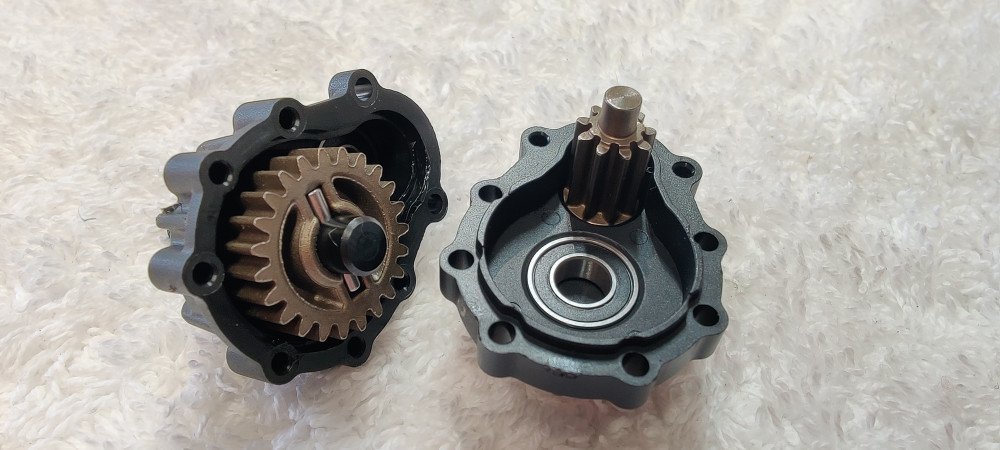
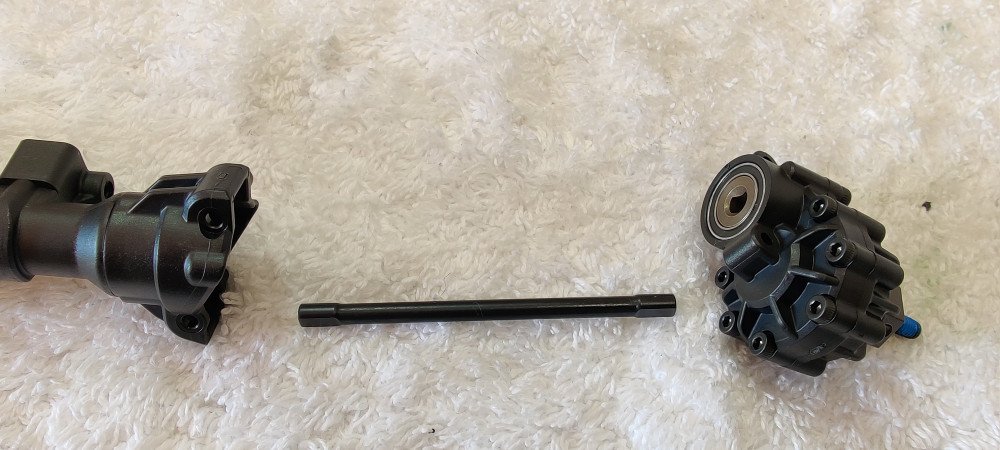
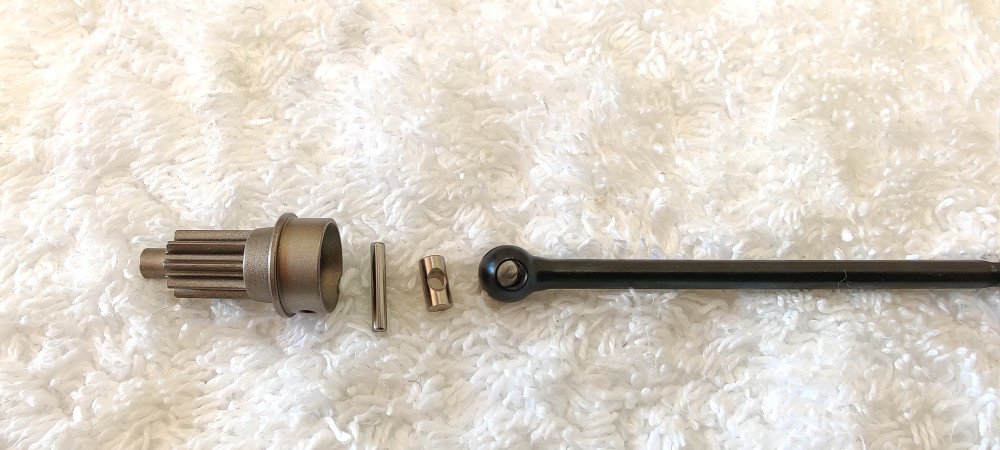
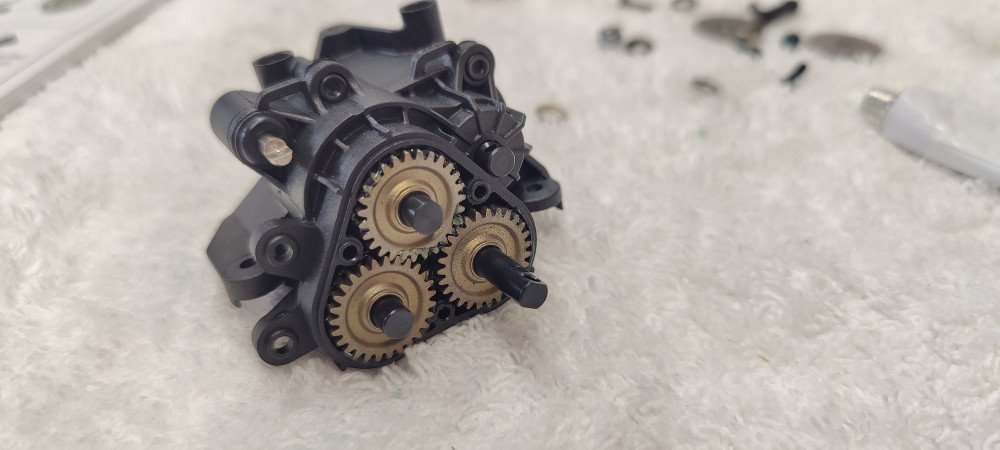
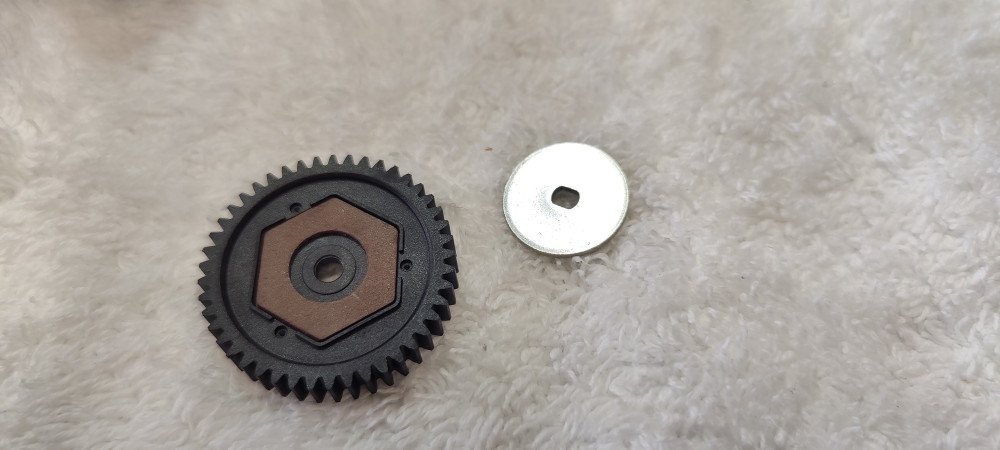
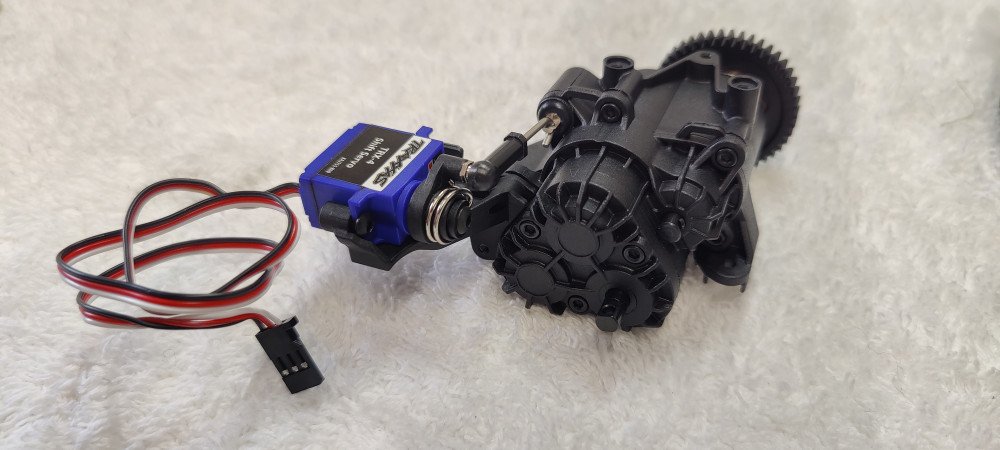
Traxxas TRX4 - Build log, PART IIIFront and rear axlesDifferentials on the TRX4 includes metalgears out of good quality. On this model they included the remote controlled locking mechanism and it works like a charm. By having an outer metal wheel with tabs on on side of the diff goung into the housing it totally blocks the diff to 100%. Below is the parts for the diffs
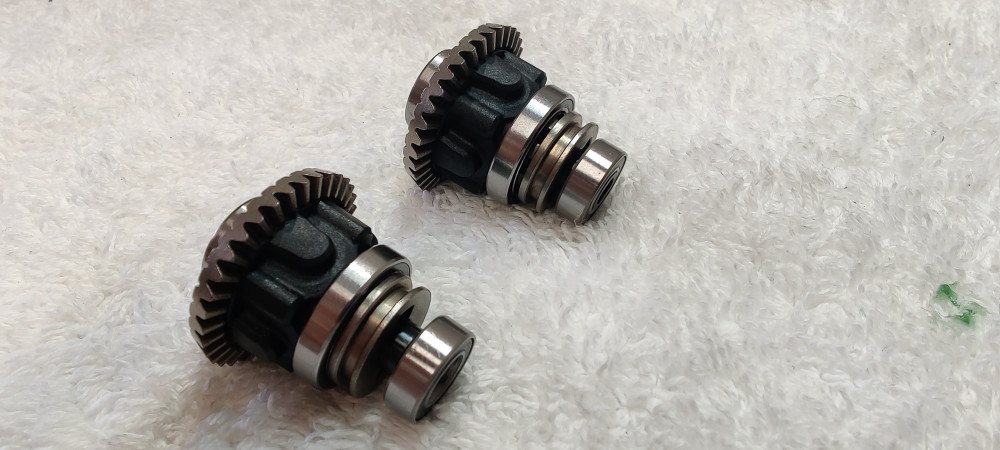
Fairly good pitch on the gears. The diffs feels smooth without any additional work being done.
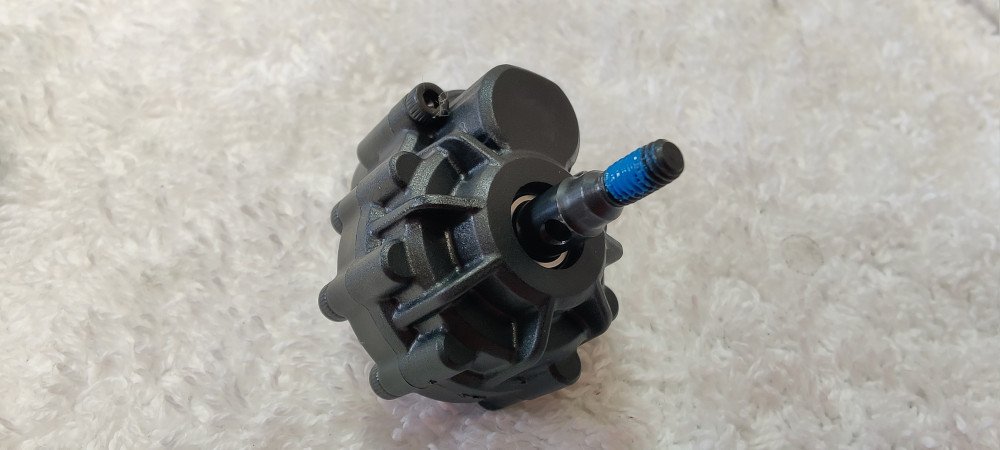
The completed unit is actually ballraced at three positions. This is deffinetily not industry standard but will, for sure let the transmission handle some rough ground.
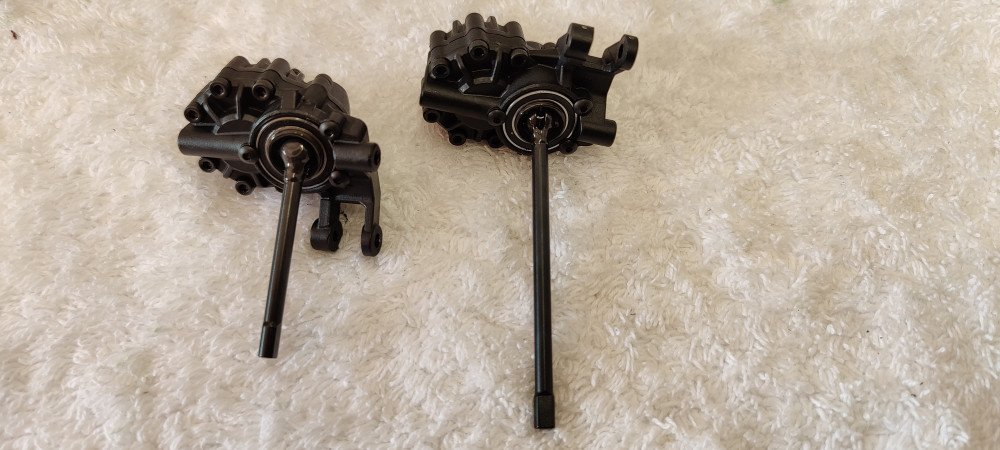
Diff installation in the axles. The complete unit feels like it was designed for a 1:1 car. One note: Check so you´re building the correct axle. Front and rear have different offset for where the diff is positioned. Ask me why I know ;)
Portal AxlesThe portals also includes metal gears of what looks like 48 pitch. They are completely ballraced as well.
Before you put on the portals you have to attach the transmission axles inside of the housings.
Up front the portals and axles are joined via CVD´s where the outer part sits directly inside the ballbearing. This is very clever and removes the need of small set-screws to keep everything in place.
The completet front portals with their respective axle.
The two completed axles with wires for the servo actuated locking effect. They look pretty neet although I would have preffered some nicer color ont the covers as the grey part looks kind of dull. You can buy option aluminum ones if you´re up to that.
Text part will be putting the chassis frame together. All the best Marcus |
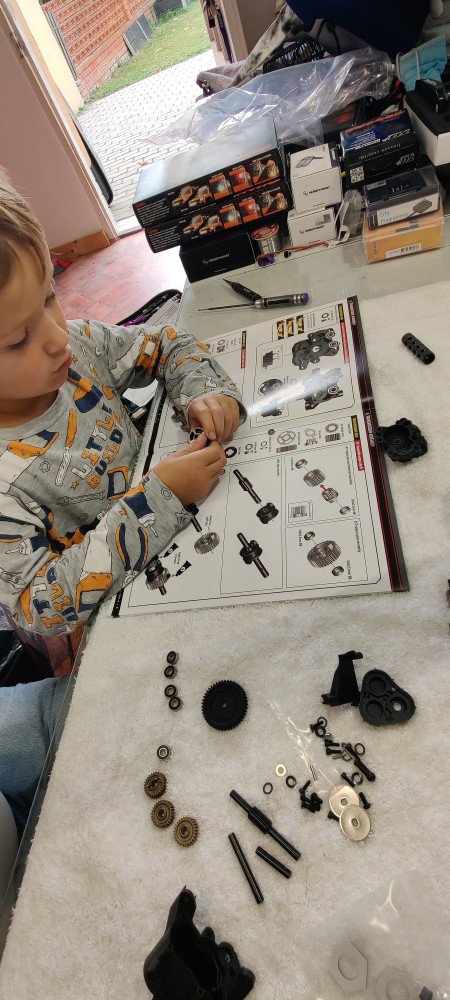
Traxxas TRX4 - Build log, Part IITime to start the building process!As I´ve been into car-racing for my entire life this is really something new. I have for sure built other kits like Tractor-trucks, buggies and largescale racecars but never ever have I built a Traxxas car in kit form. The manual is eally easy to follow and my 5 year old started as soon as we opened the right bag.
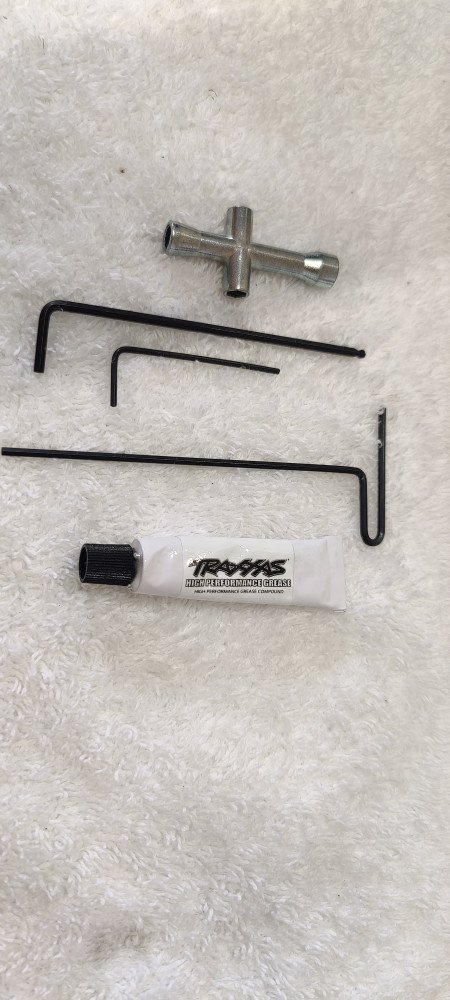
The quality of the all metal gears are really good. It has a fine pitch and wide gears that should be tough enough to withstand the abuse the Hobbywing brushless motor. I opted for the Hobbywing AXE 2100Kv setup as this had great reviews from my friends. Included toolsThe tools supplied is standard quality but I was glad to se a ball-hex driver. The included grease for the gears are of a really sticky green sort of grease.
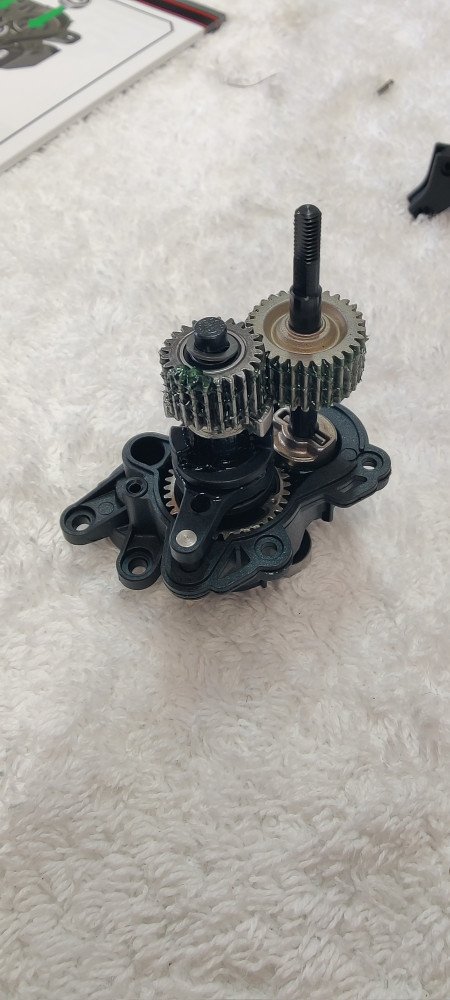
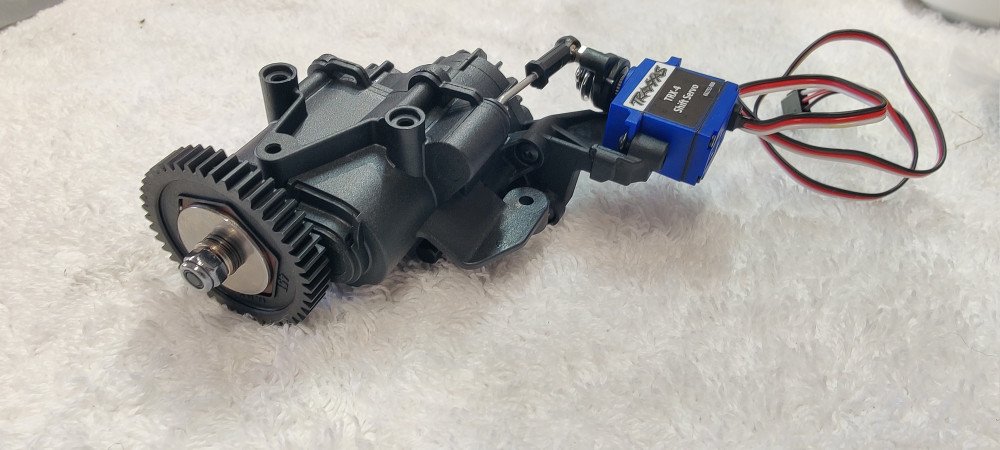
Central transmission - 2 speedsThe central transmission houses a 2-speed gearbox and its construction makes gear-shift on the fly possible. The servo operated cam shift where the rotating force is engaged. Everything is nicely sealed. The incoming shifter axle goes thrue a rubber gasjet and the two housings are interlocking.
Here is a picture of the rear side and the outgoing axle for the rear drive.
The transmission have a slipperclutch on the incoming axle. I tightened this by feeling. Just hold the outgoing axle with an allen key and you should just be able to start rotating the main gear. To hard and you will strip your gears, to loose and you will generate excessive heat and too little of acceleration.
The completed central gearbox from the rear view. The included servo for gearshifting should be waterproof.
And from the front side…
Part III will be the main axles. Marcus |
Traxxas TRX4 - Ultimate build?
IntroBeing in the RC-sport for almost 40 years gives you some experience, especially if you been into quite all of the branches of RC! Funny thing though, there is always something new to try out. I've been racing basically all major car classes, flying aeroplanes and helis, building self-designed boats as well as aeroplanes… heck, I have even produced kits. All, for what is worth! A good time for me in the hobby with mutual friends. Lately, I've noticed that the common interest for a couple of different types of cars has become huge, namely drifting and crawling! I've checked onto the latter of the two to see what this scale things are all about! The basicsThe basis for this build will be the Traxxas Trx4 in kitform. (#82016-4) I don't like buying a complete ready to run car. I want to build it myself and learn about it at the same time. Also, one benefit is to be able to introduce the building process to my kids. Get them used to the different types of tools and not being afraid to use them. Of course it would have been much cheaper to just buy a RTR but this build gives me more choices amongst the path of completion.
OptionsThere are numerous options for these types of cars but as I have zero experience of what is needed I opted for things I know, like a proper steering servo, a descent speedo and brushless motor. I've also opted for some aluminum options that should make up for good reliability.
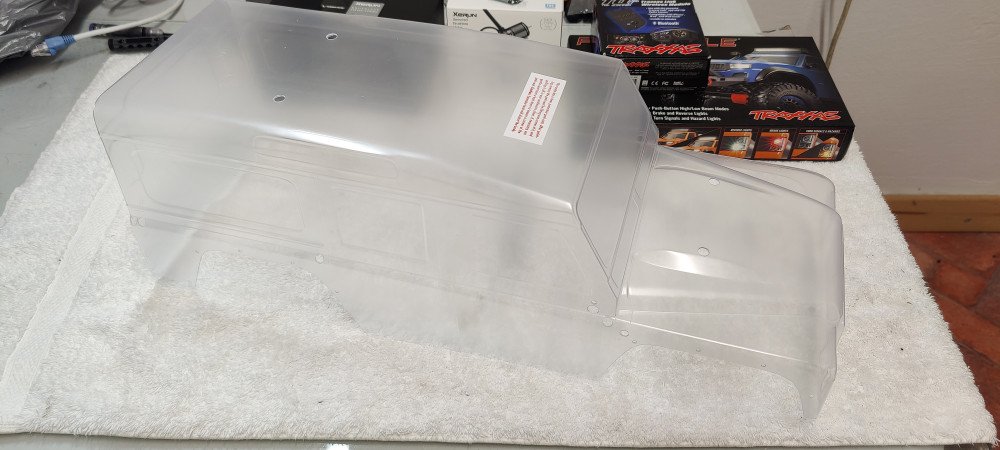
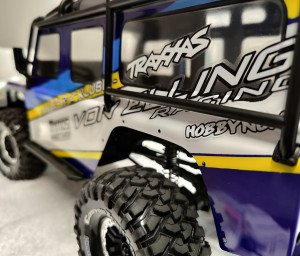
BodyworkFor this car I've chosen Traxxas Landover body in unpainted version. Please study the online manual well. There are a lot of parts needed to complete this one. Colorwise it will be something representing Sweden and its colors. It will eventually be a speaker unit on board.
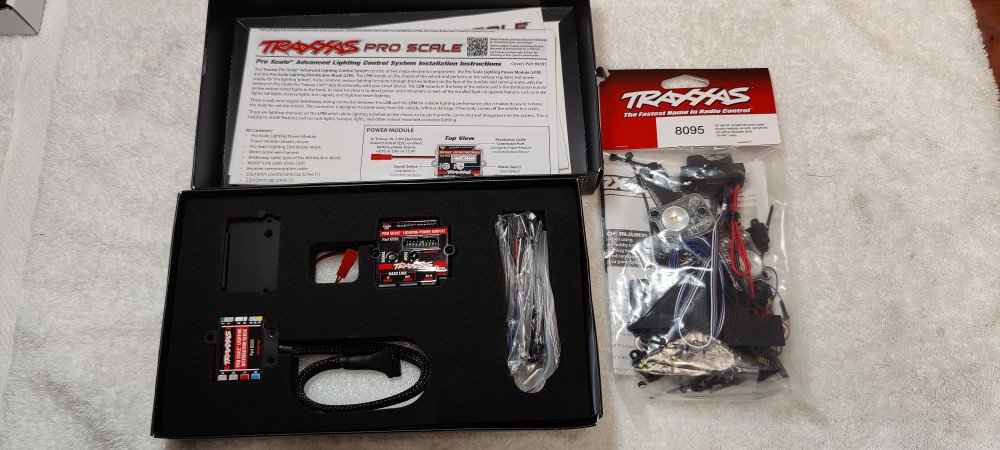
the body will get LED ligtning and the optional PRO Scale kit which not only makes the installation a breeze but also allows you to control all the lights from your phone/pad.
ElectronicsFor this build I opted for the Hobbywing AXE combo with 2100Kv motor. As for steering a Savöx1256TG with 20kg of torque is the starting option. The radio is the included TqI with additional bluetooth unit. For transmissions, like locking the diff I´m using the supplied micro servos.
Hobbywing Xerun with the Axe 2100Kv motor and AXE 80A speedo FOE system. This combo should give a super smooth control and enough power. They are IP67 water proof and the FOC (Field-Oriented Control) will be an interesting feature.
Savöx SC1256TG for the steering.
Enjoy PART II in the right menu! Happy crawling Marcus |
PM Tankmätning LargescaleFörklaring till tankmätningsprocedur inom Largescale.
|
YoutubePlease follow my youtube channel:
|


 |
Luleå R/C klubbClub |
|
 |
Lidköpings RC KlubbClub |
|
von Elling Racing on Facebook |
von Elling Racing on YoutubeMy youtube channel. Here I´m putting up most of my vids!
|
My Setups - SCHUMACHERHere are all my setups of my Schumacher cars.
|
Setup helperThis is the setup helper I´ve created to make all of you better understand the physics of your race car and what to adjust to have it drive like you want!
|
My setups -ArchiveHere you will be able to download all of my setups as PDF. This is a link to an external dropbox folder.
|
BlogpostsIll try to upload all my post written thrue the years here.
Read more
|
Organizations |
|||
|---|---|---|---|
 |
Svenska Elbils Cupen Employee | ||
 |
Schumacher Customer Fan | ||
 |
NettoRC Customer Fan | ||
 |
Schumacher Race Team Driver Fan | ||
 |
Bohus MiniRacing Klubb Fan | ||
Users |
|||
 |
Fredrik Loiske Friend | ||
 |
Rasmus Olofsson Friend | ||
 |
Elias Hedström Friend | ||
|
Martin Algervik Friend | ||
|
Per Karlsson Friend | ||


)
)
)
)
)
)
)
)
)